Putting driftwood brings many upsides to your fish tank, including its excellent functionality and adding beauty to the ecosystem. It also enhances the water quality while creating a natural and suitable habitat for your fish.
However, commercial driftwood does not come cheap, so learning how to make driftwood for aquariums is the next logical step for aquarium owners. Making your driftwood is not easy, but it can be learned if you follow our guide found in this article.
Contents
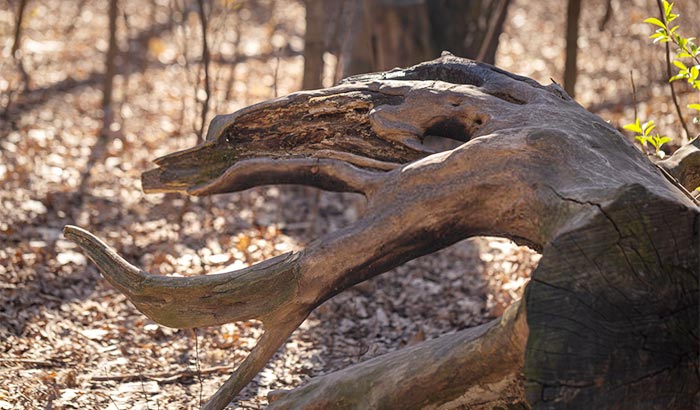
Collecting Driftwood for your Aquarium
The initial thing to do is to collect the suitable driftwood for your fish tank. You can check and look for driftwood on rivers, seas, and other bodies of water where there are no visible signs of pollution or oil contamination.
Also, when choosing driftwood, you will need to consider the shape and the size. If you have the ability to cut it, it will be better to collect bulk. You will also need to choose something without signs of fungi or mold because it might affect your aquarium even if the wood is treated.
Lastly, make sure not to select softwood for your aquarium driftwood. The reason behind it is it will not last long in your fish tank. You will also be having a hard time sinking it in your aquarium.
Preparing Driftwood for your Aquarium
After collecting the driftwood, preparing the driftwood is very important to make it suitable for your aquarium. Preparing means cleaning, curing, and learning how to treat driftwood for aquarium.
The preparation process can be a challenge and will take some time, but it is a critical process to make the driftwood fit nicely in your fish tank.
How to Clean Driftwood for Fish Tank
What You Will Need:
Driftwood, Large Container, Brush, Salt, Vinegar, and Clean Water
Step 1: Cleaning
The initial step is to clean the driftwood using a brush. The brush can be an unused toothbrush, or the regular brush used when doing manual laundry. Put the driftwood on a container full of water. You can gently scrub all over the driftwood to remove all the dirt, dust, and other unwanted particles.
Please be reminded not to use any cleaning products to clean the driftwood. It may contain chemicals that can be absorbed by the wood which in return will be released in the aquarium. It will be bad for the fish if it happens.
Step 2: Curing Process
In the curing process, you will need a large container full of water. The size should be enough for the driftwood to be submerged fully under the water. What you will do is put the driftwood on the container and leave it for 1 to 2 weeks.
The purpose of the curing process is to release the excess tannins found on the driftwood. Tannins or tannic acid is a natural substance that is not toxic but can cause the aquarium water to turn brownish or yellowish.
You can then add the salt and the vinegar to the water to eliminate all the living parasites still found on the driftwood. Once the vinegar and salt are in the container, mix them thoroughly. Then, you can wait for another one week.
Step 3: Changing the Water
After a week, you will notice some discoloration of the water. It is because of the tannic acid which was removed from the driftwood. What you will do is change the water in the container to a new and clean one. Leave the driftwood for another week.
After the one-week period, changing the water from time to time is advised. You can change the water after the ninth and twelfth days. This action is to give accurate status to the tannins level leaching from the driftwood.
Step 4: Clean the Driftwood Again
After two weeks, remove the driftwood from the container and clean it again. Use the brush to remove all the remaining dirt or other particles in the driftwood. Make sure to clean it thoroughly, removing every dirt that you can find.
Step 5: Boiling the Driftwood
The next step is to boil the driftwood putting it in a large pot with water. Make sure that the driftwood is submerged in water while waiting for the water to boil. Once the water has boiled, remove the driftwood and start brushing again to remove the last remaining dirt.
After cleaning, you can put the driftwood again in a container full of water. Wait for another one week before removing it. By this time, the driftwood should be ready to be put on your aquarium.
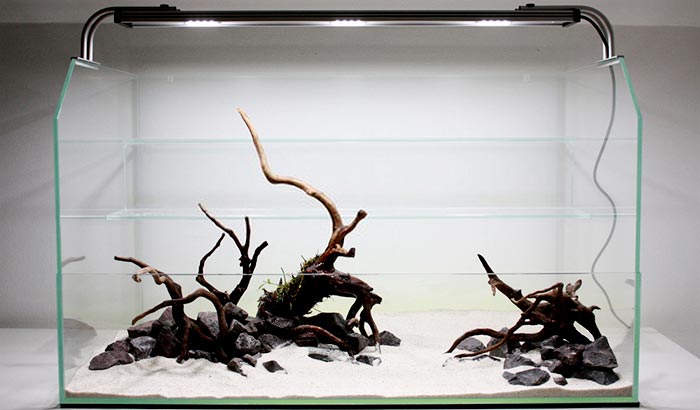
Installing the Driftwood in the Aquarium
After cleaning and the full preparation of the driftwood, the next step is to put it on your aquarium. Once you put it in your fish tank, there will be instances that it will float right to the surface of the water.
This situation is normal, but eventually, it will just sink naturally, but it may take some time. If you are experiencing this problem, you can temporarily submerge the driftwood in a container full of water and leave it for about a week or more.
Another option is for you to find a way to prevent the driftwood from floating while it is underwater. You can tie it down or put something heavy on the top. It may take a month for the buoyancy to come in and make the driftwood submerge under the water.
Once the driftwood is fully submerged, you can check on the water level and see if it is still fitted with your aquarium. You can adjust the water content if it is needed. After a few days, you can also check on the clarity of the water and make some necessary adjustments for any issues you will find.
Conclusion
Driftwood is an excellent addition to the ecosystem of your aquarium. If you do not have the budget, you can learn how to make driftwood for aquariums and still enhance the beauty of your fish tank without spending too much.