The post Why is My Fish Body Bent? appeared first on Aquatic Eden.
]]>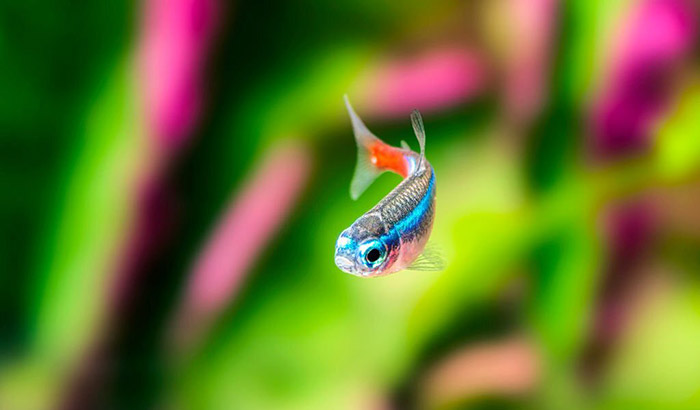
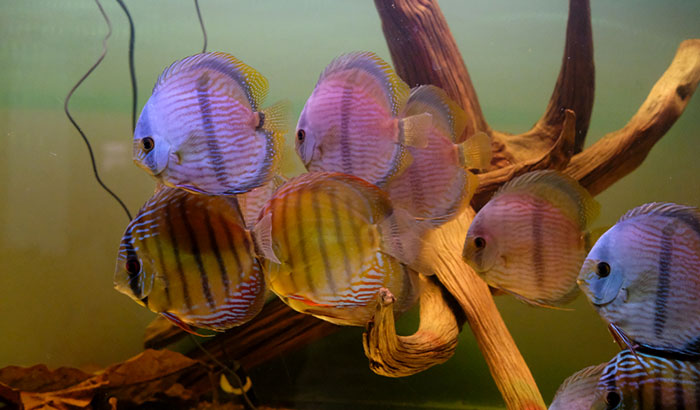
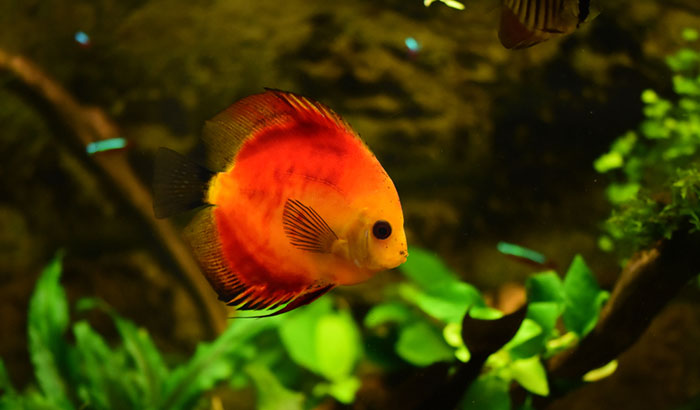
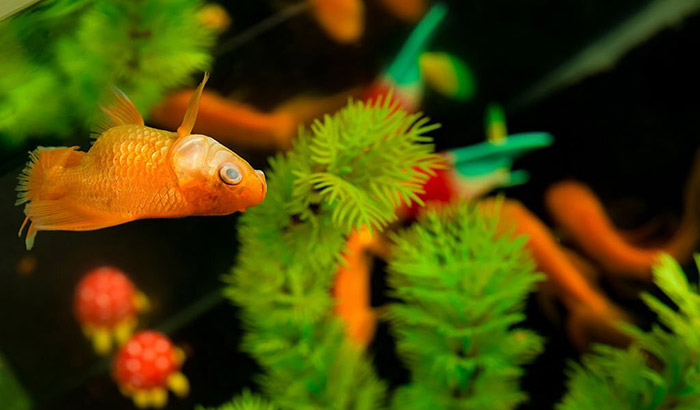
You look at your tank and notice that your fish seems to be different, looking like it has some sort of deformity. Upon closer inspection, you then ask why is my fish body bent.
It may take a while for you to notice it but once you see the bend in your fish body, then you become eager to find out more about it.
Two of the causes of the bend in your fish body are tuberculosis and scoliosis brought by inbreeding, genetic factors, and poor diet. In this post, we will discuss the causes and what you can do about them.
Why the Fish Body is Bent
Tuberculosis and scoliosis are the primary reasons why your fish’s body is curved or bent.
Tuberculosis
The bacterium Mycobacterium Marinum is the culprit for fish tuberculosis. This bacterium is highly contagious, which means one fish can easily spread it to others in the same tank or aquarium.
Fish tuberculosis or TB is a chronic disorder and may take some time to progress.
One of the major symptoms of fish tuberculosis is a bent spine.
If one day you suddenly noticed and asked why is my fish suddenly bent, then check for other symptoms of the fish listed below. Doing so will help you pinpoint if the cause of the bent spin is tuberculosis or something else.
- Discoloration
- Loss of appetite
- Loss of scales
- Folded fins
- Body sessions
- Protruding eyes
- Inflammation of the abdomen
- Edema
- Ulceration
To avoid tuberculosis in your fish, you must clean the tank regularly. Should you wish to add a new fish to mix with others, then quarantine the new fish first before adding them to your tank.
Scoliosis
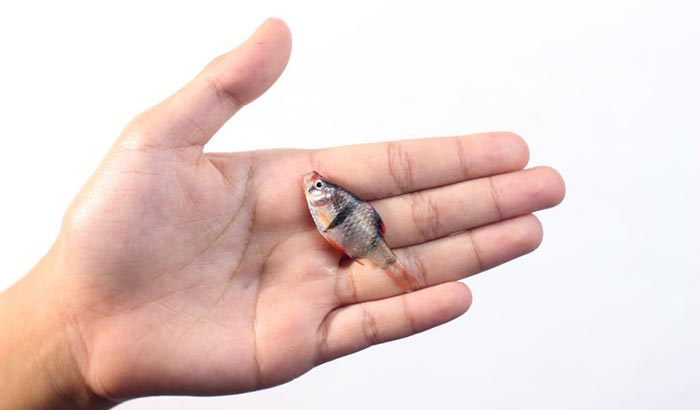
It’s not just humans who suffer from scoliosis. Defined as abnormalities in the lateral curve of the spine, scoliosis usually happens at the larval stage or fish fry stage of the aquarium fish. It involves the deformation of the fish’s spine, which is characterized by a C shape or an S shape.
The larval stage is the second stage of the life cycle of the fish and is when the fish is living off a yolk sac attached to their bodies. The fry stage is the next stage, which occurs when the young fish now called fry is now ready to feed on their own.
Because scoliosis is typically left untreated for the lifetime of the fish, it negatively affects its health. Scoliotic fish can have difficulties swimming and are often bullied by other fish.
Below are the triggering factors of fish scoliosis.

Ascorbic acid deficiency
The top cause of scoliosis among fish is the deficiency in ascorbic acid. The deficiency affects gill tissues or cartilage.
Inbreeding
Inbreeding typically leads to fry with spinal abnormalities. Inbreeding generally happens when there is a small gene pool.
Diversifying the gene pool can help avoid bent spine issues due to inbreeding.
Hereditary factors
Genetic factors contribute to fish scoliosis, just as inbreeding does. A disease can, after all, be transmitted from parent to child. 90 percent of scoliosis-affected female fish will pass the disease onto their offspring.
It is suggested that you prevent your fish from reproducing if they suffer from scoliosis, as their offspring would be likely to inherit the condition.
Poor diet and bad tank environment
It is also possible for fish to develop scoliosis if they are raised in poor tank conditions and eat a bad diet.
For instance, many tank owners often feed poor-quality dry food to guppies, one of the most popular aquarium fish species. Overcrowded aquariums, low oxygen levels, and poor quality dry food can cause them to develop scoliosis.
Much like with humans and other animals, a balanced diet and clean environment are also important for fish to prevent them from developing any diseases. As such, aquarium owners should ensure that their tanks are well kept and their fish are eating nutritious food.
One should keep in mind that overcrowded tanks often result in a messy and unclean environment. Checking the aquarium for the following parameters regularly is necessary.
- Nitrates
- Ammonia
- pH
- Temperature
- Phosphates
To ensure the health of tank dwellers, owners must conduct frequent water quality tests and monitor aquarium parameters.
Conclusion
If you take a closer look at the tank and started asking why is my fish body bent, then consider that the fish might have tuberculosis or scoliosis. Fish bent bodies are mainly caused by these two factors.
Identify other symptoms, and if you suspect tuberculosis, separate that fish from the rest of the tank. You can also prevent fish with scoliosis from reproducing to limit the number of fish with the disease born. The faster you act when you notice that your fish has been bent is useful in minimizing the possibility of the disease spreading.
The post Why is My Fish Body Bent? appeared first on Aquatic Eden.
]]>The post Why Did My Ghost Shrimp Die appeared first on Aquatic Eden.
]]>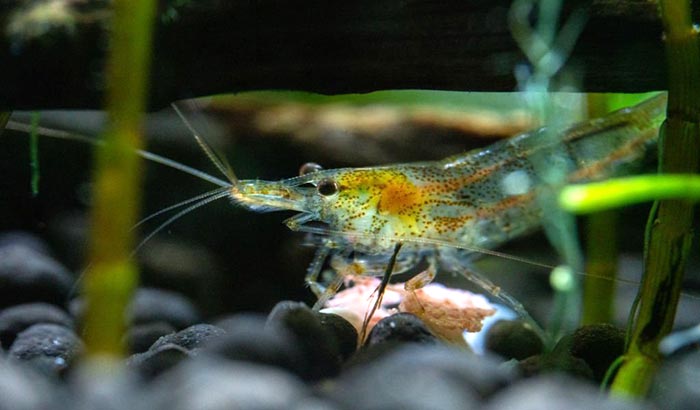
So you found the perfect addition to your tank, the ghost shrimp. It is affordable and is a diligent tank cleaner. You expected it to live for an average of one year, and yet here you are, disposing of it in months. Now, you are wondering, “Why did my ghost shrimp die so soon?”. There are various reasons why ghost shrimps die early: food intake, tank water conditions, and tank mates.
You are in a sea (or tank) of questions, and this article will help you get out of it.
Ghost Shrimp Care
Ghost shrimps are famous for their unique transparent appearance. They are freshwater scavengers that live at the bottom of the water. You might think that ghost shrimps can very well live on their own without much care. That is true if they are in the wild. If they are in a tank, best try to provide them with suitable living conditions.
“Why did my ghost shrimp die?” you might wonder. There are several possible reasons.
Food, Intake, and Molting
Ghost shrimps feed on leftover fish food, algae, detritus, live plants, eggs, larvae, and insects. You need not give much thought to what to provide it. But be mindful of overfeeding it. Overfeeding is one cause of your ghost fish dying unexpectedly. If there are plenty of food sources in the tank, it may not need external food.
Overfeeding can increase the speed of the shrimp’s growth. When that happens, there’s molting. Molting is when a shrimp sheds its old shell. And more frequent molting occurs when it grows rapidly.
Shed shells are no harm to ghost shrimps; in fact, they can serve as food to other shrimps in the tank. However, be mindful that when a ghost shrimp recently molts, it is vulnerable. What you can do is to separate it, especially if there are possible threats in the tank.
Molting is a natural, delicate process for your ghost shrimp. The environment has to be perfect for when it molts. There is a chance that your ghost shrimp will shed its healthy shell if it has a bad diet or if the water condition is not ideal.
Ideal Tank and Water Conditions
Before we dive into the ideal water conditions, let’s first discuss the tank. It is essential to have plants in your tank. They will serve as a pasture for your ghost shrimp, oxygen source, and as a shield if need be. Watch out for copper or lead that may be in the fertilizer you use for the plants. These are dangerous to the health of your ghost shrimp.
If larger fish are in the same tank, provide your ghost shrimp hiding places. They have to have a hideout for when they feel threatened or anxious.
Maintain optimum water parameters. Doing so is generally easy to neglect because there are no apparent indications. As a responsible tank keeper, you should check the water regularly.
Optimum water parameters include temperature ranging from 65º – 80º F or 18.3º – 26.67º C. The water hardness should be kept at 3 -10 dGH. On the other hand, carbonate hardness has to be at 3 -15 dKH. PH level must be maintained from 7.0 to 8.0, the nitrate level below 20 ppm. Lastly, the ammonia and nitrate should be 0.
Make sure to keep the tank water within these parameters to ensure your ghost shrimp’s health.
Overcrowding and Tank Mates
Ghost shrimps do not grow big. Their average size is up to one a half inches making them suitable to be in any tank size. Still, you do not want to overcrowd your tank. The ideal number of ghost shrimps per gallon is 3 to 5 shrimps.
Going overboard with the number of ghost shrimps in a tank may result in food shortage or dominance over a pasture. The worst that can happen is cannibalism.
As stated, ghost shrimps do not grow big. They are easy prey to larger fish. Give some thought to what kind of fish your ghost shrimp have as a tank mate. Fishes like bettas, angelfish, and goldfish will likely provoke and eat your ghost shrimp.
Do Ghost Shrimp Need a Filter
Do ghost shrimp need a filter? You might think the answer is no. They themselves keep the tank clean. But as with most underwater species in a confined tank, the answer is yes.
Though ghost shrimps do not require as much cleaning as other fishes, there are benefits to having good filtration. It helps with undergoing safe molting. Imagine your ghost shrimp molting in dirty water; it will quickly absorb the pollution. Hence, damaging their immunity.
Having a filter in the tank can reduce the frequency of changing water. Frequently changing the water can cause stress to your ghost shrimp. When you change the water in the middle of their molting, it can hamper the growth of the new exoskeleton.
Note these when getting a filter for your tank. Get a filter with a built-in intake screen, so your ghost shrimp don’t get sucked in. A soft flow filter is best so as not to disturb their swimming or crawling and not cause them stress.
Do Ghost Shrimp Need a Heater
Another question that you might ask is, “Do ghost shrimp need a heater?” Yes. They cannot live without it. Ghost shrimps thrive in warm temperatures.
Cold water affects their metabolism or causes it to stop altogether. On the other hand, if the water’s too warm, they will molt too often, making them vulnerable to bacteria and parasites.
It is essential to get the proper size of the heater for your tank. The larger the tank, the higher the wattage of the heater should be. Remember to check the temperature of the water regularly.
Conclusion
Now, take these things into consideration and apply them for your surviving or next ghost shrimp. Be confident in taking care of them as you are now equipped with the necessary knowledge to keep them alive and thriving. I hope you got the answers that you need and never again ask, “Why did my ghost shrimp die?”
The post Why Did My Ghost Shrimp Die appeared first on Aquatic Eden.
]]>The post How to Treat Popeye in Fish appeared first on Aquatic Eden.
]]>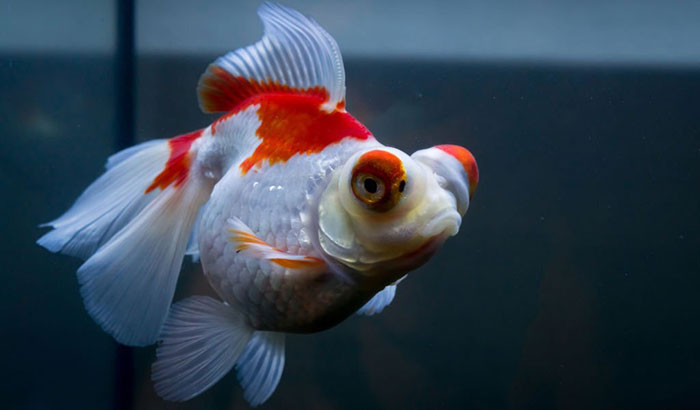
How to Treat Popeye in Fish
A fish suffering a popeye disease can be dangerous because it can lead to the fish losing their eyesight or even losing the eye itself. But how to treat popeye in fish? Please check different tips and tricks to treat it and prevent the disease from infecting the aquarium.
What to Prepare: Melafix (anti-bacterial medicine), Epsom Salt
Treating a Popeye Disease Cause By an Injury
Treating a popeye disease in a fish will depend on what is the cause of the disease. If an injury causes it, the best treatment you can provide is to let it heal on its own. This treatment is effective as long as the eye will not develop any secondary infection.
You can also provide additional care, such as using an aquarium salt to help in relieving the swelling. This care will enhance the chances of the eye being treated quickly as the absence of the swelling can help make the eye recover fast.
Removal of Dangerous Tank Decorations
One way for the fish to have an injured eye that can cause popeye is those sharp and pointed decorations. To prevent further injury, you can remove all those rough and pointed rocks, pointed and shard plants, and other aquarium decoratives with sharp and pointed edges.
Regular Water Changes and Monitoring of its Chemistry
During the recovery time of the fish, you will need to do water changes regularly while also constantly monitoring the water chemistry. It should be noted that the common cause of popeye is the poor water condition.
Hence, consistently doing water testing is needed to check if there is any problem with the water chemistry. Among those that need to be tested are the pH level and ammonia or nitrite concentration.
Removing the Fish From Aquarium
If you think that the fish already suffers from bacterial infection, you will need to separate the infected fish into a separate tank. You can call this fish tank a quarantine tank which will help to prevent the fish from infecting the other.
Then, you can use an antibiotic recommended by your veterinarian or pet supplier to address the bacteria in your fish. If multiple fish are infected with bacteria, you can consider treating the whole main aquarium to kill all the bacteria.
How to Treat Popeye in Cichlids
If your cichlid fish is having a popeye disease, there is one treatment that you can do to treat it. But you need to separate the fish in a quarantine tank for it to be effective. Please check the step-by-step guide below:
Step 1: Separate the Infected Cichlids in a Quarantine Fish Tank
To prevent the cichlids from infecting other fish, you must separate them in another fish tank. You can call it a quarantine fish tank or a hospital fish tank, but the most important thing is the separation from the other fish so that you can proceed with the treatment immediately.
Step 2: Give the Fish with Melafix and Epsom Salt
Once the infected cichlid is isolated, you can start giving the fish the treatment it needs. You can provide the fish Melafix, which is a very effective all-natural anti-bacterial treatment. This medicine is the perfect treatment for common fish wounds and abrasions.
Then, you can add an Epsom salt to the treatment. The salt is actually good as it helps equalize the water’s pressure. You can also constantly do water changes during the healing process.
Step 3: Wait Until the Eye is Healed
The key to treating popeye in cichlids is to wait. There are aquarium owners who want to have the results immediately. But the best thing to do is continue the course of the treatment, which will take a few days. So, the best thing to do is just wait for the eye to be treated.
How to Treat Popeye in Betta Fish
When it comes to treating a betta fish with a popeye, check our step-by-step guide on how to cure them below:
Step1: Removing and Transferring an Amount of Water in the Aquarium
Start by removing 10% percent of water in your aquarium and place it in a container. This container will be the place where the betta fish will be treated. Once the transfer is finished, get the infected betta fish and add it into the container.
Step 2: Epsom Salt Application
Dose your container have the right amount of Epsom salt. The right amount of salt will be determined as per the instruction given in the manual guide. The recommended amount will be in the instruction as well as the way how it will be used. But make sure to dissolve the Epson salt before putting it into the container.
Step 3: The Treatment Process
To maximize the treatment process, you can now leave the betta fish for about 10 minutes. After 10 minutes, you can not put the fish back in the main tank but make sure that the fish can acclimatize for a few minutes.
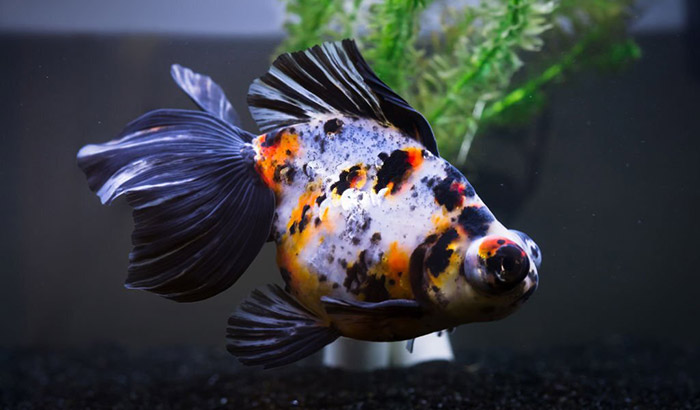
How to Treat Popeye in Goldfish
If you feel that your goldfish is infected with bacterial or parasitic infections which caused the popeye disease, you will need to do the step-by-step guide below for the treatment:
Step 1: Separate the Infected Fish
The best thing to do is separate the infected fish from the others. This step prevents the infected fish from infecting the other healthy fish. You can use a smaller fish tank which will serve as a quarantine tank or hospital tank during this treatment.
Step 2: Give Antibiotic Food
Bacterial infection is always difficult to treat but giving the goldfish with antibiotic food can help. You can give the fish flakes with antibiotics to treat the infection. This antibiotic food can be ordered at your nearest vet or pet supplier.
Step 3: Treat the Main Tank with Antibiotics
If more fish are showing symptoms of infection, it will be better for you to treat the main tank with antibiotics too. Again, these antibiotics can be purchased at the nearest pet store or vet near your home.
Conclusion
Learning how to treat popeye in fish is very important since this disease can be lethal to the fish. There are many ways to properly resolve this issue and treat the infected fish. But the most important thing to do is to know what is the cause of the disease for you to apply the right method of treatment available.
The post How to Treat Popeye in Fish appeared first on Aquatic Eden.
]]>The post How to Remove Tannins from Aquarium Water? appeared first on Aquatic Eden.
]]>
Phenols, ammonia, nitrites, nitrates, tannins, and more – many toxic chemicals are harmful to fish. Aquarium hobbyists should effortfully prevent the presence of these harmful substances in their aquariums. In this post, I will focus on how to remove tannins from aquarium water.
I will first discuss what tannins is and how it is made. Then I will explain how harmful it is to aquarium life. Lastly, I will give pointers on how to remove tannins from aquarium water.
What are Tannins?
Tannins, or tannic acid, are water-soluble polyphenols, which are naturally occurring compounds abundant in plants and historically used for tanning. Their distinct coloring properties are the primary symptom of their presence in an aquarium.
Tannins are abundant in plant life. If aquariums have driftwood in them, as mine do, the tannins in the wood will leach into the water, coloring it yellow or brown.
What are the Effects of Tannins in Water?
Tannins cause the brownish or yellowish tint of aquarium water. The discoloration of water is not a significant problem – it will not harm the fish. However, tannins are usually acidic. They will slowly lower the pH of the water, which can ultimately harm the fish.
While some fish thrive in slightly acidic soft water, like fishes from South America, fishes from the other parts of the world will most likely die in acidic water.
How to Remove Tannins from Aquarium Water
Though the discolored look of aquarium water does not hurt the fish, it takes part of the joy of having an aquarium in the first place. An unclear-looking aquarium prevents me from seeing the full beauty of the fish and some of the plant life. My primary reason for wanting to remove tannins is to see the aquarium in all its glory.
Many items can help remove tannins from an aquarium. My two favorite items are activated carbon and a Seachem product. These two items have different effects. I use either of them, depending on the inhabitants of the aquarium.
What is Activated Carbon?
Activated carbon is perhaps the most well-known filtration media for aquariums. It is made from any carbonaceous material, such as coal or coconut. The carbonaceous material is processed to enhance its absorption and adsorption capabilities.
The most widely used form of activated carbon in aquariums is granular activated carbon (GAC). And the most common carbonaceous material used for aquariums is bituminous coal, more commonly known as black coal.
How Activated Carbon Filters Aquarium Water
Activated carbon has absorption and adsorption properties. Absorption refers to the capacity to trap contaminants within the pores of the filter. Adsorption is the trapping of chemical pollutants by chemically them to the material’s bonding sites.
Activated carbon has both pores and chemical bonding sites. It effectively filters harmful chemicals such as chlorine, phenols, and, you’ve guessed it, tannins. Activated carbon helps remove the yellowish to brownish color in an aquarium. Plus, it will also restore the water’s pH level. I use activated carbon to remove tannins from an aquarium that houses fishes that live in water with a high pH level.
The problem with activated carbon is that it also filters fish medication. So if my fish is sick and I need to give them medicine, I first have to remove the activated carbon filter. But in the grand scheme of things, this is not much of an inconvenience.
Another vital thing to remember about activated carbon is that it requires replacing every month or so. I normally replace my activated carbon filter whenever I clean the gravel of my aquarium – two birds with one stone!
What are Seachem Products?
Seachem is a famous brand of aquarium-related products that every aquarium hobbyist probably knows. They have two products that help combat the discoloring effects of tannins,
Purigen and Renew. However, Renew does not remove the color leached by tannins, so I will focus on Purigen.
Purigen has a different effect from activated carbon. Unlike activated carbon, Purigen does not raise the pH level of the water. Purigen is the perfect choice for an aquarium that houses fishes that thrive in slightly acidic water.
But like activated carbon, Purigen also gets exhausted. After about thirty days, it will stop absorbing and adsorbing foreign pollutants and contaminants in the aquarium.
Final Thought
I like to maintain the clarity of my aquariums. I like seeing the fish and the plant life as clearly as possible. And when tannins get in the way of the aquarium displaying its full majesty, I turn to two items for help.
Activated carbon removes the tannins in an aquarium and raises its pH level. Purigen, on the other hand, combats the discoloration but leaves the pH level alone. I use carbon for aquariums with fishes that thrive in water with a high pH level, while I use Purigen for aquariums requiring slightly acidic water. In my opinion, these two items are the best tools on how to remove tannins from aquarium water.
The post How to Remove Tannins from Aquarium Water? appeared first on Aquatic Eden.
]]>The post The Best Aquarium Water Conditioner for 2022 appeared first on Aquatic Eden.
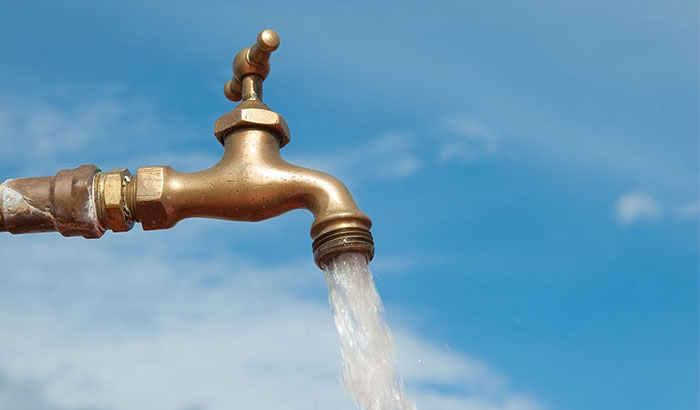
]]>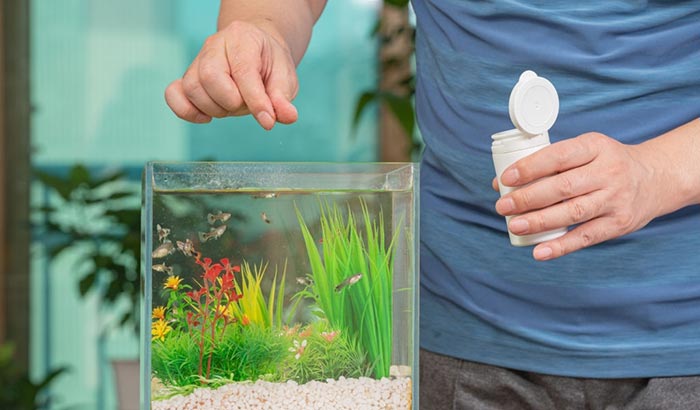 You can’t simply put tap water into your aquarium and expect your fish to be completely fine with it. Regular tap water contains chemicals that might be safe for human consumption but can make fish sick, lethargic, and in the worst-case scenario, die. This makes it necessary to use the best aquarium water conditioner beforehand.
An aquarium tap water conditioner neutralizes all the unwanted materials in the water, like metals and chlorines, making regular tap water safe to use for aquariums. If you are starting a new aquarium, restarting an old tank, or when topping off the aquarium, then you will need to use a bit of water conditioner.
Many brands of fish tank water conditioner promise that they have the finest product in the market, but it can be hard to determine who is telling the truth. This article will teach you what to look for when you are browsing through your options, so you will be getting more than your money’s worth.
Best Aquarium Water Conditioner Reviews
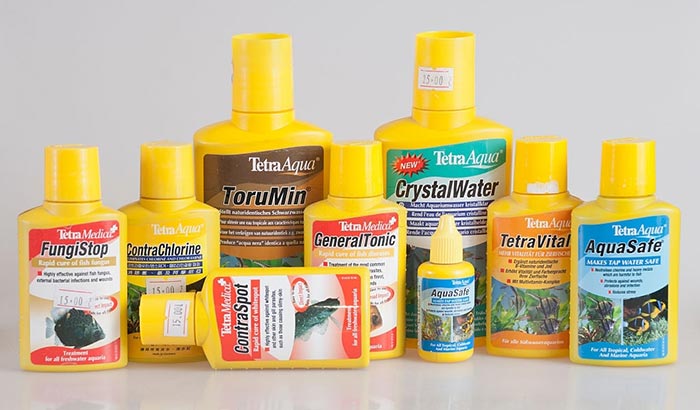
1. Tetra AquaSafe Plus Aquarium Water Conditioner

I know that it is not wise to rush through the steps of setting up an aquarium, but anything that can save time will always be welcome. This water conditioner has a fast-acting formula, making it work almost immediately. This spares me the need to spend hours just preparing the water for my tank.
Now, just because this water conditioner works fast, that does not mean it is not effective. This product can effectively neutralize all of the unwanted contaminants in tap water that can potentially harm your fish. It removes not just the chlorine but also the harmful metals that are in tap water.
The cap also serves as a precise measuring cup with lines inside that indicate the amount of product. Although it is not likely that you can overdose on a tank with this water conditioner, it is nice to have a precise measurement to prevent waste. It is also nice that you only need to use a tiny amount to condition an entire tank.
This water conditioner does more than just eliminating potentially harmful substances (for the fish and not necessarily for humans) in the water. It also supplements it with beneficial minerals that the fish needs. The deficiency of these minerals is one reason why the fish still seem weak even when the water is completely clean.
I do not have anything serious to complain about this product but it is quite annoying that you have to use a pipette or syringe to get the right amount for use in small tanks. By small, I meant tanks below 10 gallons. The instructions do not come with directions for small tanks and the cap does not have any indications of the amounts to use.
- Works quickly to condition tap water
- Neutralizes all dangerous contaminants
- Easy to use
- Provides beneficial minerals that are not in regular tap water
- Lessens the frequency of water changes
- Does not have a clear dosing instruction for small tanks
This is your basic water conditioner, but unlike most of your options, this product works a lot quicker and more efficiently. This product only takes less than half an hour to work, which means water changes and tank refilling will not take up an entire afternoon anymore. If you are starting a new aquarium, getting this is a wise move.
2. Fluval Water Conditioner
One of the things that intrigued me when I first knew about this water conditioner is that it contained herbal extracts to help fish deal with stress. Fish experience stress upon transferring them from one tank to another.
That said, they definitely need help adjusting to their new environment. This water conditioner not only makes the water safe for the fish but can also help them feel more at ease.
Another great thing about this product is that it contains all-natural ingredients. I had my doubts before that this might not work quite as well as other aquarium water conditioners but I was wrong. This product works at par and is sometimes much better than most of the water conditioners that I have used before.
It was also nice that I did not need to use quite as much product to improve the quality of my aquarium’s water. I did the math to figure out just how much of this product you need regardless of the size of your tank and it amounted to just 0.5ml per gallon of water. This means that one bottle can go a very long way.
Moreover, this water conditioner works fast. The moment I placed the right amount of water conditioner in the water, it almost immediately turned the water cloudy, which is an indication of the product working. After around half an hour or so, the water cleared back up and the aquarium was again ready for occupancy.
Just like the first product, you will need to use a pipette or syringe to measure the amount of conditioner required for a 10-gallon or smaller tank. The smallest amount that the cap can measure for is a 20-gallon tank.
- Comes with herbal extracts that help fish cope with stress
- All-natural, which means it does not contain synthetic substances
- Useful on both freshwater and saltwater tanks
- A little bottle goes a long way (0.5ml per gallon)
- Works fast and efficiently
- Does not provide measurements for 10-gallons and below
This is one amazing option for the best water conditioner for planted aquarium as it also provides additional nutrients and minerals that were previously removed in regular tap water. If you like to keep live plants in your aquarium, then this is the best choice for you.
3. Aquatic Experts TankFirst Complete Water Conditioner
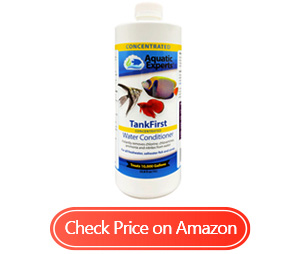
What I liked the most about this product is that unlike most of the water conditioners I have used so far, it does not have any foul odors. I have used products that smelled so bad that I had to open all the windows just to air out the room. You might not think that this is a huge deal, but fish can smell bad odors too.
Another nice thing about this product is that it works quickly. If you are like me who does not like buckets of water in the living room for hours whenever you do partial water changes, then you will love this. It works immediately once it touches the water.
Aside from removing chlorine from tap water, you can also use the product to lower the amount of ammonia in the water, and it does so quickly. It saved my entire aquarium when I discovered a huge ammonia and nitrate spike. If I did not use this product immediately, I would have a tank full of dead fish.
I can also say that you will get the most value for your money from this product. If you bought the 1-liter bottle, then you will have enough water conditioner for treating up to 10,000 gallons, give or take a few. This means that if you have a 50-gallon tank, then you are already set for at least a year’s worth of water changes.
- Does not have any foul odors
- Works quickly
- A little goes a long way
- Safe for all kinds of fish, invertebrates, and live plants
- Can also treat ammonia and nitrate spikes
- Not quite good at dealing with nitrites
Although this product worked well when dealing with ammonia, it does not do quite as good a job as I thought it would with nitrates. On the one hand, they did not claim that it can effectively lower nitrate levels, which is why I invested in a proper nitrate remover.
4. Seachem Prime Fresh and Saltwater Conditioner
This is one of the most recommended products by experienced hobbyists and for good reason. It is a highly concentrated formula, so just a couple of drops is enough to treat up to five gallons of water at a time. This means that the huge jug you will be getting will last you more than a year or two.
This water conditioner works immediately once it hits the water. If you leave the water alone it will probably take around 15 to 30 minutes to neutralize the chlorine. However, if you put a submersible pump to make the conditioner circulate faster, you can complete the process in just a couple of minutes.
Aside from neutralizing the chlorine in tap water, you can also use this product to neutralize ammonia and nitrates. If you notice a sudden spike in the levels of ammonia and nitrate in your tank, just pour a double dose of this product to stop the rising ammonia levels immediately.
If you are worried that a double-shot of this product will harm your fish, don’t be. Even though it is highly concentrated stuff, it will not do any harm to your fish or any other living organisms in your tank.
The only thing that I do not like about this water conditioner is that it has a foul odor. Make sure to open a window or two before you even take the cap off the bottle.
- Highly concentrated formula
- Works immediately to remove chlorine and chloramine
- Works as a nitrifying substance, too
- Low risk of overdosing
- Provides a safe and healthy environment for your fish
- Has a very foul odor
Seachem has always been one of the top companies when it comes to aquarium supplies and their water conditioner is not an exception. Just one bottle will have you set for more than a year’s worth of water changes.
5. API Stress Coat Water Conditioner
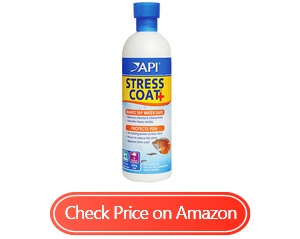
This is not just your regular water conditioner. It also doubles as a treatment for your fish. Sometimes, improperly handled fish, like when removing them from the tank when changing the water, causes damage to their slime coating, leading to ailments later. With the help of this product, your fish can regain their lost slime coating.
This product can immediately turn regular tap water into water that is safe for use in aquariums. This will immediately work to eliminate chlorine once it touches the water. After just fifteen to thirty minutes, you can expect all the chlorine in the water to become harmless to fish and other aquatic lifeforms.
This product also contains natural herbal extracts that can help your fish deal with stress and relax. Fish get stressed a lot and it usually happens when you make partial or full water replacement. When you use this water conditioner, you will notice that your fish will not stay stressed and fidgety for too long.
This can also help injured fish heal and recover quickly. I had a betta whose fins got ripped to shreds because of some sharp driftwood. After removing the offending decoration, I used this water conditioner in his tank. In just a couple of weeks, the previously mangled fins were repaired and my betta regained its previous beauty.
Here’s the catch; you need to be very careful when using this product as it is very easy to overdose. Make sure that you are using the right amount as prescribed in the instructions because you can make your fish sick if you use too much.
- Heals the protective slime coating of the fish
- Makes tap water safe for aquarium use
- Can brighten the color of the fish
- Can help injured fish recover
- One bottle can last a long time
- Easy to overdose if you are not careful
Overall, this product is a very effective water conditioner, but you need to measure the doses carefully. This water conditioner does not only make the water in the aquarium safe for the fish but also helps keep your fish relaxed and quite happy.
6. Jungle Start Right Complete Water Conditioner
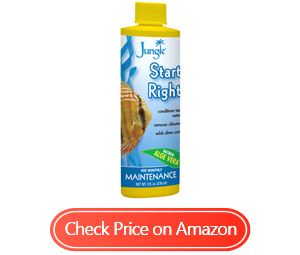
Although it might sound disgusting, the fish’s slime coat is beneficial and important for their health. If a fish accidentally removes even part of its slime coat, it can lead to serious diseases later. To prevent this from happening, I suggest using this water conditioner as it also contains compounds that can restore your fish’s slime coat.
This product contains aloe, which is an excellent antiseptic. This means that if you have any injured fish, like cuts or scratches, using this product in their tank will hasten their healing. By using this water conditioner in conjunction with medication, you can be sure that your sick and injured fish will recover in no time flat.
One reason why many aquarium keepers do not like using water conditioners that contain aloe is that they clog up the filters. I am happy to report that this product does nothing of the sort. I have been using it for a couple of months and I have not run into any problems regarding my filter system. It is still running perfectly.
Regardless if you have a freshwater or a saltwater aquarium, you can use this product without running into any problems whatsoever. This is completely safe to use and there is not even a risk of overdosing if you put a little too much of the stuff in the water.
I seriously could not find anything to fault this product. It delivers on its promises, and then some. This did not bring about any negative reactions from the fish and the live plants that I have in my tanks. This is as near perfect as you can get when you talk about aquarium water conditioners.
- Helps the fish by repairing their slime coat
- Helps heal injured fish
- Does not clog up filters and pumps
- Completely removes the chlorine from tap water
- Works for both freshwater and saltwater
- Nothing significant worth complaining about
This was a near-perfect water conditioner. It works as advertised and it does not have any side effects, at least nothing I can perceive. I highly recommend it for beginners as it will make setting up and maintaining an aquarium a lot less stressful than it is without using this product.
7. Fritz Aquatics Complete Water Conditioner
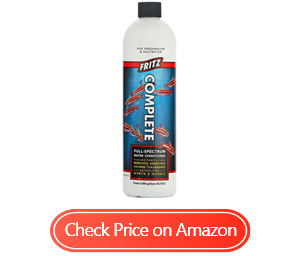
This is a sort of jack-of-all-trades as it does a little bit of everything. However, it is a good product to use mainly because it does remove all of the chlorine in the tap water. It is not the only thing that it can do. If you are starting a new tank or doing a full water change, it will help soften the water as well.
The main job of this product is to remove the chlorine that is present in tap water and it does so efficiently. You just pour the designated amount into the buckets of water waiting for you to pour into the tank. Give it a good swirl to distribute the product properly and it will be ready in under an hour.
Aside from chlorine, this water conditioner can also help remove all of the ammonia in the water. I once tested my aquarium’s water and I found that the ammonia spiked to a dangerous amount. Since changing the water is out of the question, I instead used a double dose of this water conditioner and it did the job.
For all the things that this product can do, I also appreciate some of the things that it does not do, like alter the pH level of the water. I am very particular when it comes to the pH level of my aquarium. Even though this eliminates all of the ammonia in the water, it is a bit impressive that it does not alter the normal pH levels even one bit.
I don’t have anything, in particular, to complain about in connection to how well this product works. However, I do not particularly like the horrible smell coming from this product. It is like a strong smell of rotten eggs. Fortunately, the smell dissipates after fifteen minutes or so, and it does not cling to your clothes.
- Works as an all-in-one product
- Removes chlorine from tap water
- Gets rid of excess ammonia buildup
- Detoxifies nitrates/nitrites
- Will not change the pH of the water
- Has a horrible smell, much like that of rotten eggs
Although you might want to open the windows and doors when you are treating your aquarium, you will be getting an effective and perfectly safe water conditioner. If you consider yourself a serious aquarium keeper with several tanks that you take care of, you will need a supply of this product.
8. Brightwell Aquatics Blackwater Water Conditioner

This product helps improve the health and well-being of your fish by making the water mimic blackwater river conditions. It does so by introducing beneficial minerals and other substances into the water; substances that are in nature. Although it does not tint the water a slight brownish hue, it copies the chemical makeup.
By mimicking the conditions of a blackwater river, the aquarium can help improve the health of the fish and the live plants. Before I used this product, my fish would often hide in their driftwood hiding places.
Now, they are happily swimming about. This product also provided some vital nutrients to my live plants because they are now growing like crazy that I have to prune them almost every day.
Another benefit of living in a blackwater river environment is that it encourages the fish to spawn. Don’t be surprised when you suddenly find that you have an overstocked tank because of all the new fish that suddenly appeared. Now, that would be a problem that I would be happy to have.
This product does not just add minerals to the water but also helps soften hard tap water to make it usable for aquariums. This also helped me remove the insane amount of chlorine the city puts in our water supply. It deactivates the chlorine and renders it harmless to the fish and the other organisms in the tank.
The problem here is that some people expect that a blackwater water conditioner would tint their aquarium water brown, especially those who want to make their aquariums look and behave like the real thing. In my experience, this product did give the water a slightly green color at the start, but it quickly dissipated.
- Helps establish similar conditions to blackwater rivers
- Improves the health of the fish and live plants
- Adds beneficial minerals into the water
- Helps soften hard water
- Encourages the fish to spawn
- Does not tint the water
If you are looking for an authentic-looking blackwater environment, then you would be disappointed with this product. On the other hand, this mimics the chemical composition of blackwater rivers. This keeps the plants and fish in your aquarium happy and healthy.
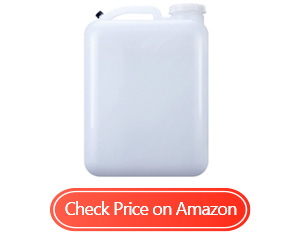
9. Flukers Saltwater Concentrate Water Conditioner
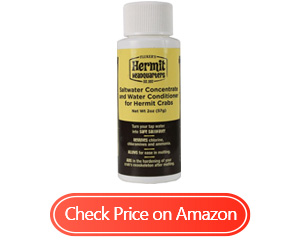
I was amazed at how this product could turn ordinary tap water into an accurate seawater facsimile. My hermit crabs loved it from the first time I used it. Although there was this one crab that would not even touch the water, I had to tweak the dosage a bit to make the water suitable for all my crabs.
I also loved how easy it is to use this product. You do not need any fancy equipment – just a mixing bowl and a teaspoon. In addition, you also do not have to prepare the water beforehand as this product will do everything for you. It will dechlorinate the water and add the right amount of salt and beneficial materials.
In the past, I would frequently buy seawater from the nearby pet supply store because I used to change the water in the crabs’ pool, sometimes 3 to 4 times a week. You can just imagine how expensive it could get. This product allows me to use regular tap water instead of the expensive bottled ones.
Speaking of value for money, I definitely saved a lot by using tap water that I treated myself. Aside from that, I only needed a couple of drops into a bucket of tap water to dechlorinate it in just a few minutes. Even if you were to change the water of your hermit crab enclosure often, this is enough to last at least a couple of months.
As mentioned earlier, I had a problem with one of the hermit crabs not even wanting to get close to the treated water. It turns out that this product does not provide enough salt to exactly mimic the ocean.
- Almost perfectly mimics the chemical properties of real seawater
- Easy to use
- Makes tap water safe for use in a hermit crab enclosure
- Perfectly safe for hermit crabs and other marine invertebrates
- Can last a couple of months
- Does not have a high enough salt content for some crabs
Keeping hermit crabs can be a bit expensive if you are still buying bottles of saltwater from the pet supplies store since you will need to freshen up the water bowl. With this product, you can save a lot of money since you can use it to turn ordinary tap water into saltwater.
10. Python Multi-Purpose Water Conditioner
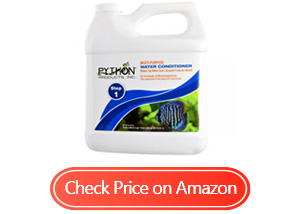
Thanks to this product, I was able to save a lot of money because I no longer needed to buy distilled water from the pet store. I can easily deactivate the chlorine in the tap water, thus making it usable in my aquarium. I can still remember the first time I set up an aquarium. Many of my fish died during the first week as I used straight tap water.
I also liked that this product is not just for freshwater tanks but also saltwater. You do not need to dechlorinate saltwater, but this product does more than just that. This can also eliminate or at least significantly decrease the amount of ammonia in the water, which should be a great deal of concern for aquarium owners.
This is also quite easy to use and does not require any special tools. Just pour the prescribed amount (as stated in the directions for use) into the water and it will begin to work. If you do not want to wait a while, you can kick start the process by circulating the water to get the water conditioner to spread out faster.
Another benefit of this water conditioner is that it also contains natural herbal extracts that aim to calm your fix, thereby helping them cope with stress. Yes, fish also undergo a lot of stress, especially when you are doing partial or full water changes. This product will help your fish relax and overall become a lot happier than before.
The only problem I have with this product is not that serious really, but if you have a tight budget then you might feel it. This product needs twice the amount to dechlorinate and condition the same volume of water compared to other brands of water conditioners.
- Makes ordinary tap water safe for aquarium use
- Useful for freshwater and saltwater tanks
- Contains herbal extracts that can help fish keep calm
- Easy to use – No additional equipment or waiting is needed for this product
- Helps remove toxic heavy metals from the water
- Does not treat quite as much water as other similar products do
It is a bit of a shame that this product needs twice as much to dechlorinate the same amount of water as other water conditioning products do. However, if you consider the other benefits that this water conditioner comes with, then you might easily forgive this light oversight.
What to Look For When Buying a Aquarium Water Conditioner

Since there are so many different brands of aquarium water conditioners that you can choose from, it is understandable if you feel a bit confused sometimes. Here are some things to consider to ensure that you will be making the right choice:
Safety and Compatibility
Of course, the first thing that you need to consider is if the product you are looking at is safe for your aquarium. For instance, will a particular water conditioner work as well on a saltwater tank as it would on a freshwater one?
Also, the best water conditioner for betta fish might not be the best water conditioner for goldfish, and vice-versa. There is no other way to check for safety other than reading through an Aqueon water conditioner review or two.
Mind you, in all review sections of water conditioners, there will always be one or two people who would be complaining that the product killed their fish. Take their reviews with a grain of salt. If there are only a few negative reviews, then they might just be isolated incidents.
How fast is it?
Ideally, you should get a water conditioner that will only take a couple of minutes to do its job, especially if you have a big tank. Ideally, when you are doing partial water changes, put the tap water into buckets then dose them with a water conditioner. It ensures that the water is safe upon pouring it into the aquarium.
Having a good water conditioner means that you do not need to wait for hours while your buckets are getting your floors wet. On the other hand, if you will be refilling your tank directly using a hose, you need to add a water conditioner immediately into the aquarium, so that the chlorine will not have enough time to affect the fish negatively.
Additional Effects
You will typically find water conditioners that only dechlorinate tap water, which is their main job after all. However, some water conditioners also provide additional benefits, like neutralizing ammonia and nitrate. There are also some products where chlorine neutralization is secondary to their main functions.
Cost-effectiveness
This is where you will be looking into the number of gallons of tap water that one bottle of water conditioner can treat. Some of the best water conditioners will only need a couple of drops to treat up to 5 gallons of tap water effectively.
Cost
The last thing that you need to consider is the cost. This is not to say that the most expensive water conditioner on the market is also the best aquarium water conditioner for well water.
There are plenty of products that work the same way but are much cheaper than the top brands. Again, since you will not be able to test the product on hand, the only way that you can find any information on whether a product is good or not is to look for customer reviews.
Frequently Asked Questions
How Often Should you add a Water Conditioner to your Tank?
Ideally, you should add a water conditioner whenever you do partial water changes. Either you pour the water into the tank and then add the water conditioner, or put the tap water into buckets, and then treat them before you pour them into the aquarium. You should also use a water conditioner if you are going to reset the tank.
Can you Overdose an Aquarium Water Conditioner?
Most aquarium water conditioners for fish tanks are non-toxic so you can just throw the whole bottle into your tank with an assurance that the fish will be safe. However, some require that you measure the doses carefully.
Typically, you do not have to be super accurate when dosing your aquarium with a water conditioner, but at least try to get as close as you can to the required amount.
Conclusion
Although you might not see it working, one of the most important tools that you need to have in your aquarist tool belt is a bottle of aquarium water conditioner.
Since you reached the end of this article, it must be safe to assume that you already know all that you have to search for when you are out shopping for the best aquarium conditioner. Not only will you get the most value for your money, but you can also ensure the safety and well-being of your fish.
The post The Best Aquarium Water Conditioner for 2022 appeared first on Aquatic Eden.
]]>The post How to Lower TDS in Aquarium appeared first on Aquatic Eden.
]]>
A high concentration of TDS or Total Dissolved Solids is not suitable for your aquarium and the fish because it can reduce water clarity while decreasing photosynthesis in aquatic plants. The high concentration can also combine with metals and other toxic compounds to increase the water temperature.
So, it is a must to constantly monitor the TDS level and keep it at the desired level. But how to lower TDS in Aquarium if it is too high? Check various tips and tricks we have listed below.
Do Water Change Regularly in the Fishtank
When learning how to lower TDS in freshwater aquarium, you must need to know that the TDS level is all the things you put in your aquarium. Whether it’s the food or the vitamins or anything that you add to the water will contribute to the higher concentration of the TDS. So, the TDS concentration will also go higher as time goes by.
If you keep the water in the tank for a long time, it is normal for the TDS levels to increase. But, to maintain or reduce it, then you must do water changes regularly. But how often will depend on how fast the TDS builds other water. So, checking the TDS level regularly is also very important.
Avoid Overfeeding the Fish
If you ask why TDS increase in aquarium, it is because anything that you put in the water can increase its TDS level. And that includes the food that you are giving to the fish. Also, if you have the habit of giving more food to the fish, then it is likely that it will contribute to the increase in TDS levels.
It does not matter if you are in several fish tanks or just a single aquarium. The most important thing to do is give just enough food for the fish. No more, no less. Those uneaten foods which will float or sink at the bottom of the aquarium can help in starting the buildup of TDS concentration.
Having a Reverse Osmosis Filtration System
Using the Reverse Osmosis Filtration System is the most effective way to lower the TDS concentration in your aquarium. If you have this filtration in your home, the water in your aquarium will be filtered out of all the TDS elements.
This process can eliminate almost all of the TDS or at least reduce the TDS concentration to a very low level. If the TDS level reaches up to 500 ppm, this method is the best one to reduce the level up to 50 ppm.
Once the aquarium water undergoes this filtration system, it will significantly reduce the TDS level of your aquarium water. In effect, the water quality will also be very high because water quality was being filtered in its purest form through the filtration system.
Using the Process of Deionization
If the RO filtration system eliminates almost all of the TDS substance in the water, then the Deionization process will eliminate what is left from the RO filtration system. This situation is the reason why it is so much better to combine the two processes.
Deionization is also being used to completely eliminate the remaining TDs level in the distilled water. Deionization is also being used to treat hard water while producing soft water. But in the aquarium, it works best if it supports the RO filtration system.
Helpful Tips:
- Each fish can survive different TDS levels, which means whatever fish you have in the aquarium, you need to maintain the desired TDS level for them to survive. The key is to know the TDS level requirement of the fish in the aquarium and maintain it all the time
- A TDS meter will be used to monitor the TDS level of your aquarium. This tool will give you an insight into what substances are there in the aquarium water. This tool can also be used to measure the TDS level of new water before it will be added to the aquarium
- Testing the TDS level can also be used when trying to add a new hardscape or other materials to the fish tank. If you try to soak stones in a bucket of water, it will result in increasing the TDS level, which means that the rock is dissolving
- Using inert rock will not affect the TDS concentration. On the other hand, using limestone should make your aquarium water to 400 ppm or more. But make sure to get a fish that can survive around this TDS level
- Using fertilizers in your planted fish tank can naturally increase the TDS level. However, most of the fertilizers are not toxic to fish unless you will try to overdose the aquarium
Conclusion
Learning how to lower TDS in aquariums is excellent knowledge to have as an aquarium owner. As you put more substance in the aquarium, it is normal for the TDS level to increase over time. We have presented different ways to lower the TDS level, and all have been proven to provide effective results.
The post How to Lower TDS in Aquarium appeared first on Aquatic Eden.
]]>The post DIY CO2 Recipe: Duration vs. Intensity appeared first on Aquatic Eden.
]]>The main thing to remember is that depending on what proportion you add the ingredients, you will either get very intense CO2 production for a short period of time, or milder CO2 production for a longer period of time.
If you add more sugar and yeast, the CO2 production will be more intense, while adding less of both means it will last longer. This is because as yeast create CO2, they produce alcohol which eventually poisons the yeast and kills it.
A smaller amount of sugar and yeast means the whole process is slowed down and lasts much longer. I opt for this type of mix, only because I find it a pain to replace the mixes every week, let alone every few days! My recipe usually produces CO2 at a fairly regular rate for about 14 days. It will continue to produce CO2 for at least another week or so, but it will produce less and less each day.
This recipe works well in containers of roughly 2 liters (soda bottles, juice containers):
Ingredients:
2 cups sugar
1 tsp baking soda
1/2 tsp yeast (regular dry baker’s yeast is fine, see picture)

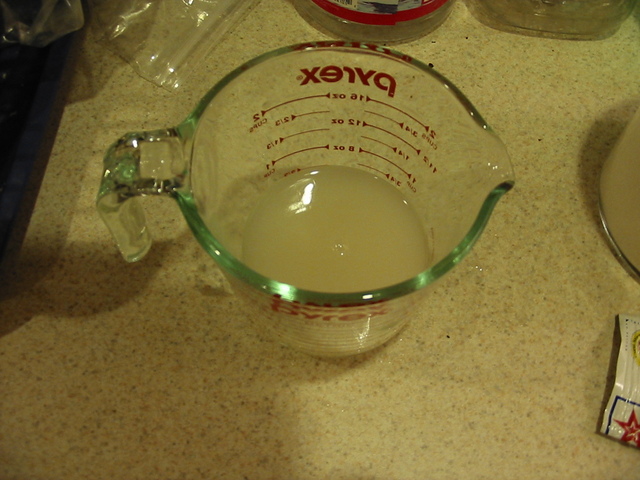
- Start with a small cup or bowl and add a small amount of lukewarm water and a pinch or two of sugar. Mix in the yeast with a fork, stirring vigorously until the water is bubbly. This will help to “activate” dry yeast by adding oxygen, preventing mass die-offs that occur if you just dump the yeast into the water. Let this sit while you prepare the container, or for at least 10 minutes, and stir every few minutes to keep the water oxygenated.
- Rinse out your container if you have used it before to remove all traces of alcohol. Fill it about 2/3 of the way with lukewarm water. Tap water is fine.
- Using a funnel, add the 2 cups sugar and the baking soda to the water in the container. If you’ve used the container before, it’s likely you don’t have a lid you can use to close it up and shake it, so just put the palm of your hand over the opening and turn it upside down over the sink and shake it gently, making sure to keep the seal with your hand. The point is just to dissolve most of the sugar in the water (otherwise it will just sit on the bottom). If you haven’t used the container yet, wait to drill a hole in the lid till after you’ve shaken it up, just to save yourself a sticky hand.
- If it’s been about 10 minutes or longer, pour the yeast and water mixture into the container using a funnel. No need to mix it up, just put the lid on and it should start producing CO2 in anywhere from a few hours (I’ve had it start in around 1 hour!) to 12 hours depending on how well you activated the yeast.
If you don’t have any bubbles after 12 hours, you’ve probably either got bad yeast or leaks. A leak is much more likely in a DIY setup like this and trust me, it will make you reconsider plunking down $300 for a pressurized CO2 system.
The post DIY CO2 Recipe: Duration vs. Intensity appeared first on Aquatic Eden.
]]>The post Methods of Diffusing CO2 in the Aquarium appeared first on Aquatic Eden.
]]>
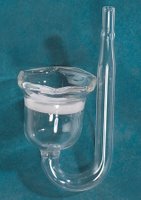
Bell – (very low efficiency) About the most low-tech way of dissolving CO2 is by using a bell-shaped (or any shape as long as it holds gas) container turned upside-down in your tank. The CO2 tubing is placed underneath the bell and the CO2 bubbles rise up and collect inside the upside-down container. The CO2 dissolves passively and very very slowly. This will give you almost no CO2 concentration in your aquarium just because you can’t run the CO2 faster than it dissolves and it dissolves so slowly, plants probably use up the CO2 as soon as it dissolves. One way to make it moderately more efficient is to aim a powerhead or filter exhaust across the bottom of the bell (the open end). This diffusor can be made quite easily at home.

Airstone – (very low efficiency) This is probably the second least efficient way of dissolving CO2 in your aquarium, but with a little ingenuity it can be made more effective. Try to get the airstones that create the finest bubbles. Limewood airstones are best, but they clog fairly quickly. These make fairly small bubbles, but to be really effective you have to keep the bubbles from racing up to the surface and escaping. Try to position the airstone as deep as possible. You can also put the airstone under the intake or exhaust of a filter or powerhead to trap the bubbles and send them with the current, thus keeping them in the water for longer and increasing the efficiency.
Glass Diffusor – (low to medium efficiency) One of the most popular methods due to its ease and low cost, it is slightly better than a regular airstone, although it is basically the same principle. A ceramic disk emits fine bubbles, finer than an airstone. However, this disk can collect dirt and debris and become clogged with algae, creating much larger bubbles and reducing its efficiency. A soak in bleach will help to clear the blockages. Again, try to position the glass diffusor as deep as possible in the tank. It can also be made much more efficient by placing it under the intake or exhaust for a filter or powerhead. Glass diffusors often need higher pressure to work and they may not work well or work at all with DIY yeast CO2 systems.
Bubble Ladder – (low to medium efficiency) This is another inexpensive, simple option which consists of a series of zig-zagged ramps or a twisted ramp placed on upright on the side of the aquarium. CO2 enters from the bottom and the bubble is forced to travel along these ramps to reach the surface. Meanwhile, the movement helps to dissolve the bubble. These work by extending the amount of time the bubble takes to reach the surface, thus giving it more time to dissolve. However, the bubble is rarely completely dissolved by the time it reaches the end of the ramp and is allowed to escape to the surface. The downside to these is that they are often big, bulky, and ugly and there is no real way to hide them.
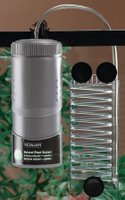
Filter or Powerhead Intake – (medium to high efficiency) Perhaps the easiest high efficiency option is using a filter or powerhead as a reactor. All you need to do is put the CO2 tube into the intake of either a canister filter or powerhead. The motor will suck up the bubbles which will be either immediately pulverized by the impeller (powerhead) or drawn through the filter media, dissolving rapidly along the way due to the high flow, and then into the impeller (canister filter). Most ot the time when using a canister filter, you won’t even see the bubbles coming out of the exhaust as almost all of the CO2 is dissolved. A powerhead is a little less efficient, as it just spews the fine bubbles into the tank and some of these rise to the surface and escape, but not before taken on a wild ride around your aquarium. Depending on the filter or powerhead, the CO2 bubbles can make a fairly loud ticking or whooshing sound as they are met by the impeller blades, and some aquarists may find this too annoying.
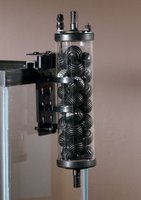
In-line Reactor/Counter-flow Reactor – (high to very high) These can be DIY or bought, but tend to be quite expensive to buy or labor intensive to make. However, they can’t be beat in terms of efficiency if they are working correctly (another issue if you build it yourself). It’s basically a chamber connected to the exhaust of a canister filter or powerhead placed vertically. The lower end of the chamber is often left open or covered with a sponge, unless it is an in-line design, where the bottom is connected to tubing that returns to the tank. The CO2 is released into the chamber, and as it tries to rise to the surface, it is pushed back by the flow of water. Even if it makes it to the top of the chamber, it has nowhere to go but back into the flow of water (the top of these chambers is often shaped like a funnel to force the bubbles back into the flow). To make it more effective, bio-balls or other oddly shaped filter media can be put inside to help break up the CO2 bubbles as they are tossed around. The biggest problem with these reactors is that since they don’t have any effective means of breaking up the larger bubbles, if too much CO2 is pumped in and the flow isn’t strong enough, the bubbles collect and form larger bubbles which dissolve much slower. So balancing the flow of the water and the flow of CO2 is critical to achieving optimal diffusion.
The post Methods of Diffusing CO2 in the Aquarium appeared first on Aquatic Eden.
]]>The post How to Dispose of a Dead Fish Eco-Safely appeared first on Aquatic Eden.
]]>
Every aquarium keeper has to know how to dispose of a dead fish. Failing to take proper measures may bring the same fate to the other fishes in the tank. Though keeping an aquarium is not as attentive as having a dog for a pet, it should never be neglected.
Regularly cleaning the fish tank reduces health risks for your underwater buddies. But however much care you’ve given, the inevitable happens. You will find a dead fish floating aimlessly in the aquarium.
Quickly Remove From the Tank
When you spot a floating dead fish in your tank, act swiftly. Fish it out and save other organisms from catching anything terrible. The longer a dead fish is in a tank, the more risk there is for its tank mates.
A fish is quick to decompose once it dies. It releases toxins that can cause other fish to fall ill. If a contagious illness is the reason for its death, there will be a high chance for the other fish in the tank to follow suit.
The safest way to take out the dead fish from the tank is by using a net. It is easy, and it reduces direct contact with the dead body. When you fish out the body, have a zip lock bag ready for easy transport of the body. If you are the type of fish keeper that gets emotional when your fish dies, it’s helpful to put your dead fish in a paper bag before putting it in a zip lock bag.
If you do not have a net, use your hands. Be sure to wear disposable gloves. Even if dead fish are generally not harmful to you, remember to wash your hands with soap afterward thoroughly. And remember to sanitize any equipment used to handle the dead body to rid of the germs and smell.
If you are not yet ready to dispose of the body, put it in the freezer to slow down its decomposition. Do this while you decide where to dispose of the body.
What to do with a dead fish? Flush or Bury?
When asked how to dispose of a dead fish or what to do with it, people will answer to flush it most of the time. It’s easy, quick, and simple. But it is not the most ethical method.
Why Should You Not Flush a Dead Fish?
Flushing a dead fish has various unfortunate consequences. Due to its harmful effect on nature, the American government has made it illegal in the states.
Flushing a dead fish may not seem harmful at first, but the effects will show down the pipe. Once you flush a dead fish, you expose wildlife creatures to diseases.
Burial Locations
The acceptable way is burial. There are many places where you can bury the body. There are also various ways to do it. If your fish is essential to you, give its burial some thought.
So you have decided to bury your scaly friend. Now, the question is, where? Legally, it should be on your own property. Look for a small area in your backyard where you can dig a hole big enough to fit your fish. It does not have to be 6 feet deep, just enough to cover the foul smell.
If you want to give your fish the best burial you can provide, get it a fish casket. There are fish caskets in the market. They are made eco-friendly and are suitable to hold decomposing fish underground.
Another resting place for your fish that you may consider is a pot. Turn the body into fertilizer. The decomposing body is not as useless as it lets on. It would provide your plant with the sustenance it needs to grow healthy.
Other Options
One safe way to dispose of the body is cremation. You can seek advice from a vet on how and where to cremate your dead fish. Or look for a pet crematorium near you.
Some will also throw the dead fish in the waste bin along with other garbage. This way of disposing of the dead fish is alright but make sure to wrap the body using a biodegradable material. You want to avoid the garbage collectors having direct contact with the dead fish. To be sure, you can label the wrapper just to inform the collector of what’s inside.
Clean the Tank
To make sure your fish do not meet their end sooner than you would like, clean their tank. Cleaning the tank removes whatever toxin is left in the tank by the dead fish. Change the water and check for any signs of parasites.
Check as well if any of the remaining fish has caught a disease. If one is sick, apply proper quarantine measures not to infect the other organisms. Place the sick fish in a separate bowl and ask a vet what to do next to make sure it does not die as well.
Conclusion
It is a sad situation to be in – to dispose of a pet you have cared for and fed. And since you have treated it well, why not treat it well all the way. A fish keeper hates to think of their fish dying, but it is natural. And when it comes to that unfortunate end, know how to dispose of a dead fish without compromising others’ safety.
The post How to Dispose of a Dead Fish Eco-Safely appeared first on Aquatic Eden.
]]>The post How to Make Tap Water Safe for Fish appeared first on Aquatic Eden.
]]>
Tap water is safe for drinking and other forms of human consumption but is not suitable when used in your fish tank directly. What you do is treat the water first before applying it to the aquarium. Do you want to know how to make tap water safe for fish? Find out the step-by-step process below.
Step 1: Testing the Tap Water
The initial step is to test the tap water you are going to treat. The reason behind this action is to know different factors since tap water composition varies from one place to the other. Testing the pH level, carbonate hardness (kH), general hardness (gH), and heavy metals are essential indicators that determine the tap water quality.
There are many testing kits available that can be used to test all the spectrum you need with your tap water. Another option for you to do is ask the local fish shop in your area about the quality of water, but this cannot be trusted since water quality varies from one location to the other.
Testing the pH level
When it comes to testing the alkalinity of your water, you need to have around 6.6 to 7.8, which is near the neutral level. Although, you also need to take into consideration the type of fish you have in the aquarium because some of them require a particular pH level.
Testing the Calcium Carbonate (kH)
Calcium carbonate is the white stuff that builds on the showerheads and other places in your home. In the aquarium, the kH level also helps stabilize the alkalinity of the water. For freshwater fishes, you need to have 4 – 8 kH as an excellent measurement for calcium carbonate.
Testing the General Hardness (Gh)
Testing the general hardness will indicate the presence of other minerals in the water apart from the calcium carbonate. The presence of other minerals such as magnesium and calcium will help the fish grow and thrive.
Testing the Heavy Metals
Most of the heavy metals found on tap water are beneficial to the fish. There are also others that can be very hazardous to them. Metals such as Iron and Copper will provide benefits to the fish tank, but Lead, Arsenic, and Mercury are not something you want to be in your aquarium. There are specific test kits for these metals that can be used for your tap water.
Step 2: De-chlorinate your Tap Water
The presence of chlorine in the tap water will surely hurt your fish. There are two ways to de-chlorinate the water. One is to let it sit for 24 hours to allow the salt to evaporate. The other way is to treat them with chemicals, specifically conditioner, to evaporate chlorine and chloramine.
The tap water conditioners will be able to neutralize chlorine and chloramine through water treatment. These conditioners are readily available in the market and are an essential tool in making tap water safe for your fish.
Step 3: Removing any Heavy Metals
Once you determine the presence of heavy metals in the tap water, the next step is to remove it if there is any. There are many fish-specific products that can be used to remove the presence of heavy metals in tap water.
But another reliable way to remove these unwanted metals is through the process of reverse osmosis. This process will remove all the unwanted chemicals in the tap water and will make it pure. Setting a Reverse Osmosis system in your home is ideal if you have the capacity to finance it.
Step 4: Conditioning the Tap Water
After removing the chlorine and other unwanted metals in the tap water, it is likely that there are still other harmful substances found in the water. To eliminate this unwanted harmful substance, applying a conditioner is a necessity.
Giving the best tap water conditioners will not only treat your tap water but will also provide those important nutrients needed for your fish. These conditioners are expected to provide Iodine and Vitamin B which help in reducing the stress of your beloved fish as well as prevent diseases.
Once you apply the conditioner, it is also the best time to transfer your fish to the fish tank if you still have not done it. Starting your filtration system is also essential to get things moving.
How to Make Tap Water Safe for Fish Without Conditioner
The method we discussed above is just one way to make tap water safe for your fish. The downside of this method is using a conditioner that contains chemicals that may be harmful to the fish.
With that said, there are other ways to treat your water without actually using the conditioner. These methods are the Reverse Osmosis system, electromagnetic water treatment, and many more that do not use chemicals.
The reverse osmosis system is a treatment process that does not use any chemicals to purify the tap water. This process will actually remove all the contaminants found on tap water to make the water safe for your aquarium.
You can set up a reverse osmosis process at home by purchasing in the market. It may be expensive, but it is worth it, especially if you want to take care of the fish seriously.
Meanwhile, electromagnetic water softening is another type of chemical-free purifying process that can make tap water safe for the fish. This process will not remove the magnesium and calcium from the water. Instead, the process will soften it to make the water safe from your fish.
Conclusion
Learning how to make tap water safe for fish is essential if you are an aquarium owner. Although tap water is safe for human consumption, it is not the case if you use it for your fish tank. It needs to be treated to be safe for the usage of your aquarium. The methods we discussed above are some of the ways to make your tap water safer for your fish.
The post How to Make Tap Water Safe for Fish appeared first on Aquatic Eden.
]]>