Having an aquarium in your home can be fun and rewarding, but some challenges come with it, especially on the maintenance side. One of which is a leaky fish tank which is considered a nightmare to most fish tank owners. But how to fix a leaky fish tank? As an owner, it will be essential to deal with this serious issue, especially with the threat of the aquarium being leaky will always be there.
Nobody wants a leaking fish tank in their home, right? In fact, a leaky fish tank, if not acted immediately, can lead to the breaking of the whole tank and making your home wet all over. But this situation will be prevented if you act immediately and find the solution in dealing with a leaking fish tank at home.
Contents
How to Fix a Leaky Aquarium
A fish tank usually leaks due to the worn-out sealant that was used on the joint areas that connect the glass panes of the fish tank. If you are not familiar with the sealant, the silicone connects all the glass panes in the aquarium and helps prevent the water from leaking through the connection. Over time, this sealant tends to worn out while reducing its effectiveness which makes the leakage happen.
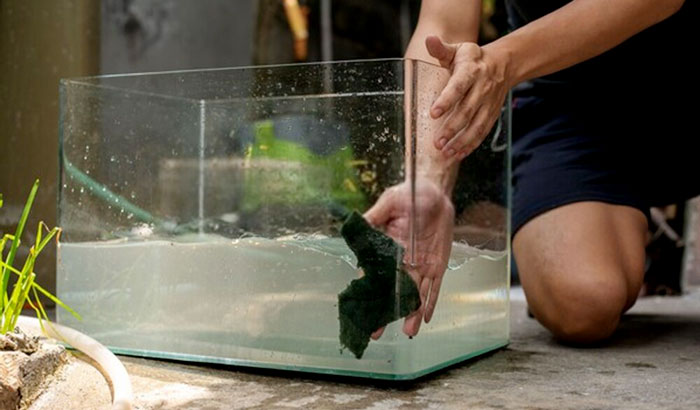
When your fish tank is compromised, it also means serious trouble for your precious fish. Firstly, you need to do a leak test to determine the seriousness of the situation and find out if your aquarium is leaking. You can get some paper towels and run them to all the seams of the aquarium. If the paper towel picks up some water or there is moisture transfer to the towel, then you need to reseal your aquarium by doing the following steps below:
What You Will Need:
- Fish-safe silicone sealant
- Containers to hold your fish while the resealing process happens
- Straight razor for the removal of old sealant bead
- Acetone
- Old Cloth
In this process, we will completely drain the tank for the simple reason that sealants usually will not be as effective when combined with the old one. So, we need to remove all the water to give us the chance to remove the old sealant bead. Please check on the step-by-step process of sealing a leaking fish tank.
Step 1:
The initial step is to transfer the fish to the containers to allow the draining of water quickly. But make sure to do it slowly so as not to stress all the fish as you put them on the temporary container. You can also clean the tank if you have time, just like gitting two birds in one stone. Then, remove all the water in the aquarium through draining.
Step 2:
Start removing the old sealant using the old razor but take note of the residue that is left during the removal. All the residue can be removed through the use of acetone. But make sure to remove all the residue and the joints free from the old sealant to have a new solid seal on the new bead.
Step 3:
The next step is to apply ¼ inch bead of the aquarium sealant to the aquarium, starting with the joint. After that, you can move to the interior of the tank but ensure that the glass walls are separated through the silicone bead. You will also need to ensure that there are no air bubbles trapped in the seal to get the sealing quality you need.
Step 4:
Then, you will need to apply an inner bead of sealant since the intense water pressure will push the sealant loose, which means doing this step is essential. This interior bead is vital since it will help support the strength of the sealant. Then, you can repeat the sealing process on the other joints of the fish tank.
Step 5:
Let the sealant cure to maximized its strength and waterproofing properties. Actually, the curing mechanism begins when the sealant comes in contact with the air. The sealant will be cured in 24 hours in normal conditions but should reach its maximum adhesion in seven days.
Step 6:
Once the sealant is cured, you can start refilling the fish tank with water. But, this should be done gradually, filling the tank three inches at a time. Make sure that the seam is secure and there is no leakage before proceeding to add more water. Once the fish tank is refilled with water, move to return all your aquarium accessories, including the fish.
How to Fix a Leaking Aquarium Without Draining
Actually, to make it easy for you, you can also fix a leaking aquarium without fully draining the water. But you will need to check or locate the exact location of the leak to make it easy to reseal it. Once you have found the leaking spot, you can drain some water only and bring the water level below the leaking spot. There is no need to drain all of the water from the tank or make it empty during the resealing process.
After removing enough water, you can start removing the old sealant but make sure to remove it altogether. You can use acetone to completely remove the residue to ensure that everything is clean before resealing. This situation can make or break the quality of the result of the sealing process. Once it is clean, you can apply the new sealant to the space where the leakage happens. Make sure to apply enough sealant to cover the leaking area.
Once you finished the application, allow the sealant to dry, which should be after 24 hours of application. But if you want to make the most of its adhesive and waterproofing properties, drying it for seven days can give you maximum result. Once it is fully dry, you can refill some water to check if the resealing process was a success.
Conclusion
Learning how to fix a leaky fish tank is an excellent skill, especially if you are just new to having an aquarium in your home. It is usual for you to face this issue in your journey but learning to deal with a leaking aquarium will help if you experience it in the future. What is important is to maximize all the maintenance process and apply it to your aquarium. Doing this action will minimize issues in the future in relation to your fish tank.