The post How to Clean Plastic Aquarium Plants appeared first on Aquatic Eden.
]]>
New homes are always clean and pristine, but this changes over time.
The same can be said for tanks or aquariums as their appearance and environment change once it’s been lived in. Much like any home, you must clean the tank’s contents, removing and scrubbing them so everyone residing in it will be comfortable and healthy.
Cleaning tanks, however, is not as straightforward as it seems. Plastic aquarium plants, for example, can be quite difficult to restore to their former state. It’s important to know how to clean plastic aquarium plants properly to ensure they don’t get damaged while cleaning.
The Challenges of Cleaning Plastic Aquarium Plants
Although plastic aquarium plants may be easier to clean than live ones, cleaning them can still be a hassle.
This is because using too much force while brushing can damage artificial plants. Plus, using harsh chemicals can cause health problems for your aquarium fish and other tank dwellers. Dirt particles may also continue to cling to the plastic plants even after they’ve been washed.
How to Clean Artificial Plants in Aquarium
Cleaning aquariums regularly will go a long way in preventing moss and debris build-up. Here’s how you can do it.
What You’ll Need
It won’t take much special equipment or fancy supplies to clean your plastic tank plants. You can easily find everything you need in your home. Here’s what you’ll need to prepare.
- Clean water
- Kettle or water heater
- Container
- Scrubber
- Vinegar or bleach
- Spray bottle
Step 1: Take Out The Plants
Taking out the plants from the aquarium is the first step. Do this when you’re changing the water of the tank and after you have removed the fish. Carefully pull out the plastic plants to avoid stirring up debris.
You don’t need any special equipment to do this. You can use your bare hands or a net to remove the plastic plants from the aquarium.
Step 2: Wash, Soak, and Scrub
Wash the plastic aquarium plants with running water. Using warm water is ideal as it can help sanitize and loosen debris tucked into them.
You can expect some algae on the plastic plants. Algae may be more difficult to clean than other dirt or buildup but you can easily remove them.
There are three options on how to clean algae off plastic aquarium plants during the wash and soak step.
Using boiling water
You can use boiling water to wash the plastic. After all, it is much easier to kill algae contamination with boiling water. Plus, boiling water limits the possibility of exposing your tank dwellers to chemicals.
Here’s how you can wash and soak using boiling water
- Place the newly boiled clean water in a clean container
- Place the plastic plants in the container with boiling water
- Leave for ten to fifteen minutes
- Using your scrubber, remove all algae on the plants
- Take out the plants from the container with water
- Wash them with running water
- Air dry the plastic plants
Using bleach mixture
You will need a bleach mixture when you are dealing with heavily contaminated plastic plants with algae. Boiling water alone sometimes won’t remove the algae.
Here is how to clean plastic plants using a bleach solution.
- Mix one part of bleach with nine amounts of water in a container. Do not use a metal container as it will react to the bleach.
- Place the plastic plants into the mixture
- Leave for at least 15 minutes
- Scrub the plants using the scrubber
- Soak the plants again in the bleach mixture for at least another 15 minutes
- Remove the plants from the bleach solution
- Rinse the plants with running water for a couple of minutes
- Make sure that every part of the plant has been washed off with clean water
Using bleach mixture
The vinegar mixture is great for removing the calcium residue build-up. Instead of spending hours scrubbing the plastic aquarium plants, soaking them in a vinegar mixture will save you hours of
- Mix half a cup of vinegar and half a gallon of sterilized water in a container
- Mix them well
- Pour the vinegar mixture into a spray bottle
- Spray the mixture on the plastic plants, making sure each area has been sprayed with the solution
- Scrub the plants using the scrubber
- Wash the plants in running water
- You can air dry the plants before putting them back in the aquarium
Step 3: Drying the Plants
Drying the plants is necessary to avoid introducing any water to the aquarium that has not yet been acclimated to the tank’s environment.
Plastic plants that still have water on them can cause an imbalance in the environmental structure of the tanks. Simply air dry the plastic plants for a couple of hours until all the moisture is gone.
Step 4: Putting Back the plants
Simply put back the plants in the aquarium. Be careful when you place them back so you won’t mess up the order of the other decorations or items inside the tank.
How to Clean Plastic Plants Before Putting in Aquarium When They’re New
Cleaning brand-new plastic aquarium plants are much easier than cleaning those that have been used in a tank.
While brand new plastic plants are not contaminated with algae and other buildup from the aquarium they can still be contained with particles or dust.
You don’t need to sterilize them. Simply wash them in cold running water before putting them in a container filled with cold water for soaking.
Leave the plants soaked for at least five minutes and wash them again with running water. Make sure to air dry the plastic aquarium plants before putting them inside the tank.
In a Nutshell
Cleaning plastic aquarium plants is not that complicated. However, you must be careful in cleaning them by simply following the above steps on how to clean aquarium plants.
Otherwise, you may not be able to remove all the contamination and build-up found on the plant. You can also expose your tank dwellers to harmful elements and put them in danger if you fail to wash and dry the plastic plants properly.
The post How to Clean Plastic Aquarium Plants appeared first on Aquatic Eden.
]]>The post How to Quarantine Aquarium Plants appeared first on Aquatic Eden.
]]>
Aquatic plants furnish our fish with oxygen, food, and a place to play around. Aside from the biological benefits these plants give to our fish, they also make our aquariums livelier. However, immediately placing a new plant in water may cause harm to your fish. Learn why and how to quarantine aquarium plants to lessen the risk of getting your fish and other plants sick.
Why Quarantine Aquarium Plants
No matter where they come from, too many risks are involved with placing a new plant in an aquarium. Some unwelcome guests and chemicals will tag along into the new habitat.
One group of hitchhikers you will see in new plants are algae, pests, and parasites. Although algae post no severe harm to aquamarine animals and plants, it is better to avoid algae growth in your aquarium, especially if there are no algae-eating fish in the tank. Once algae begins to grow in your tank, it can spread quickly all over, and it will be difficult to remove.
Pests and parasites can not only cling to plants already in the tank, but they can also cling to your fish. When they are introduced to your tank, you will see less and less of your plants and possibly your fish falling ill soon enough.
Harmful chemicals and bacteria are the members of the next group. They are not visible to the naked eye, yet extremely dangerous. These chemicals include pesticides and contaminants. Getting your fish sick is not the worst they can do. Most often, fish die from exposure to these chemicals.
If the plant was previously housed where there are diseases and bacteria, placing it in your tank without proper quarantine measures is a mistake you don’t want to bear fruit. Your fish will quickly pick up the diseases and bacteria that came with the plant and fall sick. You should be especially wary if the condition is contagious.
How to Quarantine Aquarium Plants
Before you begin the process, make sure that you have an available quarantine tank.
Step 1: Remove dead leaves and rock wool
The beginning of the process is removing dead leaves and rock wool from the roots. Make sure to remove all sponge-like and absorbent materials that came with the transport of the plant.
Step 2: Cut Off Overgrown Roots
If your plant has overgrown roots, cut back 1–2 cm of the roots using a pair of scissors. Then wash the plant using clean tap water.
Step 3: Sterilize the plant
I have listed three sterilization methods in this article. Take your pick, and the next steps will depend on what you choose. As a precaution, do these methods using hand gloves.
Bleach sterilization
With this process, you will need regular bleach, d. Make sure it does not contain additives (colorant, scent, soap, etc.) harmful to plants. The ratio of water to bleach is 20:1. Fully submerge the plant in the bleach solution for 90-120 minutes, depending on the plant’s sensitivity.
In another tank or a bucket, prepare your dechlorinated water by adding a water conditioner into the water. Rinse your plant and try to remove the bleach before soaking it in the dechlorinated water. The plant would stay in the dechlorinated water for 3-5 minutes.
Rinse the plant several times with clean tap water. Arguably, this sterilization process is enough precaution, and some will actually put their plant in the tank after rinsing it.
If you are not satisfied, you can quarantine your plant for five days. Do a total water change with a dechlorinator daily. Rinse it with clean tap water, then introduce it into your aquarium.
Hydrogen Peroxide sterilization
Get 3% hydrogen peroxide and mix it with water. Use 2-3 ml of hydrogen peroxide for every gallon of water. Preferably in a dark area, submerge your plant into the solution for 5 minutes.
Rinse the plant thoroughly and treat the plant with a water conditioner for 3-5 minutes. You can now plant it into the aquarium or put it under a 5-day quarantine.
Alum sterilization
Dissolve 1-3 tablespoons of aluminum sulfate into a gallon of water (room temperature). The amount of alum will depend on the sensitivity of your plant. Soak the plant for at least 3 hours if you use more alum. Soak it for three days if you used one tablespoon of alum or less.
Rinse the plant with dechlorinated water. Lastly, introduce it into your aquarium or quarantine it for five days.
Conclusion
However minor the threat is, one must always be careful in introducing new plants into an aquarium. Quarantining the aquarium plants is not an option but rather a necessity. Knowing how to quarantine aquarium plants may save your fish and other plants from diseases. It will also keep your tank and its habitats clean and healthy.
The post How to Quarantine Aquarium Plants appeared first on Aquatic Eden.
]]>The post Iwagumi and Sanzon Iwagumi Aquariums appeared first on Aquatic Eden.
]]>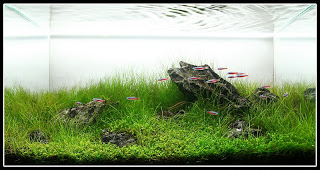
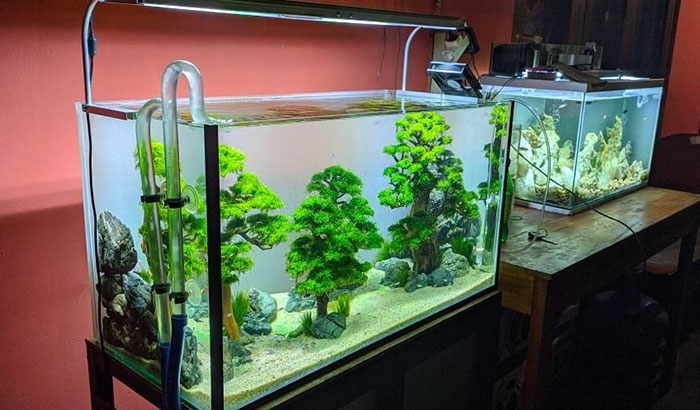
Iwagumi aquascapes are a subset of the Nature Aquarium style, pioneered by Takashi Amano. Based of Japanese gardening principles, iwagumi literally means “rock formation.” Rocks form the structure of Japanese gardens, and so in an iwagumi aquascape, rocks play a major role. Also, how these rocks are placed and how many of them there are is also very important. Many different styles of iwagumi have been adapted to the aquarium, but the overall theme is that of tranquility and simplicity.
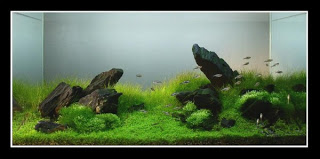
The most common iwagumi style is called sanzon iwagumi. Sanzon means “three pillar” in Japanese and these aquascapes make use of three rocks, with two smaller rocks and one larger rock. According to JAANUS, this term was first used in the 11th century Japanese garden treatise “Sakuteiki.” The grouping of stones comes from Buddhism; the central stone is called the chuusonskei (or the big Buddha) and the smaller flanking stones are called kyoujiseki (or attendant stones). The kyoujiseki are often tilted or pointed towards the chuusonskei as if bowing down to it. The chuusonskei is almost always positioned according to the Golden Rule.
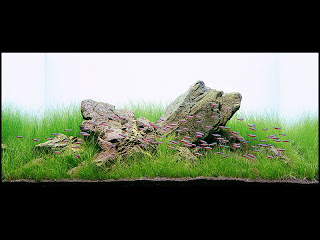
Other styles are less frequent, but always make use of an odd number of stones of varying sizes. In the aquascaping community, iwagumi has taken on additional traits as well. Iwagumi aquascaped aquariums often have one single type of carpeting plant (often glosso, hair grass, or hemianthus callitrichoides) and one single species of schooling fish (most commonly rummynose tetras, cardinal tetras, or harlequin rasboras). This adds to the feeling of simplicity in the aquascape.

Many assume that caring for and maintaining an iwagumi aquascaped aquarium is easier than other styles. It is in fact much harder due to the restrictions in terms of a single plant species and the high light levels. Carpeting plants are often rather slow growers and don’t absorb much in the way of nutrients. Therefore, starting an iwagumi aquascaped aquarium and getting it balanced is by far one of the most challenging aspects of the hobby. Algal blooms are common and stem plants are not available to help cycle the tank and achieve a balance. Instead, it is a lot of trial and error trying to get rid of algae and determine the correct fertlizer levels. Most use Amano shrimp or other types of shrimp to help control aglae. Iwagumi aquascaped aquariums are definitely not for beginners, but can be some of the most beautiful and peaceful aquascapes imaginable.
The post Iwagumi and Sanzon Iwagumi Aquariums appeared first on Aquatic Eden.
]]>The post How to Fertilize Aquarium Plants Naturally appeared first on Aquatic Eden.
]]>
Adding plants into the aquarium’s ecosystem brings so many substantial benefits to the fish and the aquarium in general. However, commercial fertilizers can be expensive at times, so fertilizing your aquarium plants naturally is the best way to go.
But how to fertilize aquarium plants naturally? There are different methods and ways to do it where a fish tank owner can make a fertilizer using materials accessible in our home. Please check the list below:
Method No. 1 Maximizing Biological Fertilizers Found in the Aquarium
There is no better way to fertilize your aquarium plants naturally than using the aquarium’s ability to create a natural fertilizer. What does it mean? A fish tank owner can make natural fertilizers using the aquarium’s natural ecology.
One way to do it is to use a biologically active filter in your fish tank. This filter will serve as the heart of your planted aquarium. An excellent and well-designed filter containing an activated charcoal can help produce good bacteria.
This bacteria will then work in the process of symbioses to purify the water, which in turn benefits not only the plants but the fish as well. Always remember that in an aquarium with well-equipped biologically active filtration, plant fertilizers will just develop naturally.
Method No. 2: Give a High-Quality Fish Food to the Fish
A lot of fish tank owners do not know that giving high-quality fish food to the fish can also help in fertilizing the aquarium plants naturally. These fish tank owners usually ask themselves do aquariums plants need fertilizer at all without knowing that fish foods can produce natural fertilizer.
Using only this natural way of fertilizing, the plants can either not do well or not grow at all in the aquarium. You need the support of bright lights and other high-quality fertilizers to make the plants thrive in the aquarium.
But, if you focus on this natural way of creating an organic tank, there are some things that you need to apply in the aquarium apart from giving high-quality organic food. First, you will need to have enough bio-load, a good amount of uneaten food, and enough fish and plant waste to sustain and fertilize the plants.
In addition, you must use sand, fine gravel, or capped soil as your substrate in the aquarium while eliminating the need to clean or vacuum it regularly. This step will allow the plant and fish waste to be processed naturally and converted into fertilizer.
Making the aquarium organic will also limit aquarium owners from doing water changes. The partial water changes are kept at a minimum level or none at all. This step prevents the organic nutrients from being washed out during the water change.
Method No. 3: Making DIY Fertilizing Powders
Another way to fertilize aquarium plants naturally is to make a homemade fertilizing powder on your own. Instead of relying upon commercial fertilizers, why not create your own using simple and natural ingredients?
Making homemade fertilizer is also economical, simple, and inexpensive to create. Creating a powder-based homemade fertilizer will only need simple ingredients like Epsom salt, potassium, sulfate, and saltpeter. Using the ratio of 3:3:2:1, you will just mix all the ingredients to create your own powder natural fertilizer.
Application of this natural plant fertilizer should only be in small amounts. You can use a teaspoon for every ten gallons of water for your initial dosage. You can use this fertilizer every water change to replenish the minerals and vitamins levels in the aquarium water.
Method No. 4: Making a Homemade Fertilizer Tabs
Another way to fertilize the plants in your aquarium is to make homemade fertilizer tabs. Making this natural fertilizer is easy as long as you get the needed ingredients. The primary ingredients of this homemade fertilizer are calcium montmorillonite clay powder and human-grade mixed powdered seaweed.
What you will do is mix 5 tablespoons of the calcium clay powder and 1 tablespoon of seaweed with water until you will get the needed consistency, similar to wet modeling clay. Then, you can shape the mixture into tabs or balls and allow it to dry.
Apply this homemade fertilizer by digging a hole in the substrate near the roots of the plants. Put the tabs in the hole and cover them with the substrate. The roots will consume the nutrients and minerals of the tabs for up to six months.
Method No. 5: Maximizing the Benefits of the Trace Minerals
The trace minerals such as iron and zinc can serve as natural fertilizers in your aquarium. The presence of these trace minerals can help the plants thrive and grow inside the fish tank. But, how can you get these minerals?
Some aquarium owners use specialized aquarium gravel in their fish tanks because they are an excellent source of trace minerals. Another option is to use iron-rich red clay. But this clay must be boiled to kill any unrelated organisms before using it in the aquarium.
In applying these materials to the aquarium, you will only need to place them under the aquarium gravel. Doing this step will allow these materials in improving water chemistry, benefiting the plants in the fish tank.
Conclusion
How to fertilize aquarium plants naturally? Several methods have been presented above to fertilize the aquarium plants naturally. Using biologically-active filters and high-quality foods can help. You can also make homemade fertilizer using natural ingredients, which can be used for the plants in your aquarium.
The post How to Fertilize Aquarium Plants Naturally appeared first on Aquatic Eden.
]]>The post How to Disinfect Aquarium Plants appeared first on Aquatic Eden.
]]>
Bringing in any new specimens to an aquarium will need careful consideration on your part. You have to be sure that the new organism does not carry any disease that will disrupt the delicate balance of the aquarium’s ecosystem. You need to know how to disinfect aquarium plants to keep the fish safe and happy with new plant additions.
This post will teach you how to quarantine and disinfect new aquarium plants. Let’s begin!
Why Disinfect Aquarium Plants?
The several reasons why you should learn to disinfect aquarium plants before introducing them to the tank are:
Snail Infestations
Snail infestation is the most common problem with introducing new plants to an aquarium. Unwanted snails often hitchhike on aquarium plants and make a home of your tank. While having snails in a fish tank is not terrible, having too much of them can feel like an invasion of the tank for the fish.
Parasites and Predators
While not as common as snail invasions, parasites and predators are more dangerous to your fish than snails. Parasites and predators can kill your fish within a few days of getting into the tank.
For example, dragonflies and damselflies can catch and eat fish and shrimps of their size! And once their nymphs get into the tank, it is near impossible to get rid of them utterly. The best way to save your tank from these pests is prevention.
Algae, Fungus, and Other Diseases
Some plants may carry algae, fungus, and other substances that mean bad news to your aquarium tenants. These substances can lower the quality of the life of your fish. They will get sick faster and lose their vibrant colors. Death is not a farfetched possibility.
Pesticides and Other Toxic Contaminants
The aquarium plants may not have strange organisms living in them because they were treated with pesticides. But without quarantine and disinfection, you are risking the toxic chemicals spreading all over the tank. Such an occurrence can result in a rapid decimation of your fish.
How to Disinfect Aquarium Plants
Now let’s get into the meat of this post. Here are the steps to disinfect aquarium plants.
Preparation for Disinfection
Before the actual disinfection process, you have to prep your plants. For the preparation method, you need first to clean your plant.
By cleaning the plant, I mean to remove dead leaves. Get rid of stones and soil in the roots. If it was shipped, make sure to remove all sponge-like materials that may have stuck to the plant. Such materials can absorb the chemicals you will use for disinfection. These are unnecessary additions you don’t want to be included in the tank.
If there are overgrown roots, you would want to cut them. Just trim 1–2 cm of the roots using a pair of scissors. Do not be afraid, as the roots will grow back.
Now, using clean tap water, gently rinse your plant. After thorough rinsing, set the plant aside because it is time for disinfection.
4 Disinfection Dips
There are four disinfection dips you can use to disinfect your plant, and you will need a separate tank for the process.
Just a reminder, while working on the sterilization or disinfectant, put on safety gloves and goggles. Work in a calm environment – an area less prone to accidents.
First Dip: Bleach (Chlorine)
Bleach, also known as sodium hypochlorite, is a familiar household cleaning agent. Use a regular bleach, unscented bleach for this dip. Additives such as colorant, scent, and soap are harmful to the plants.
In your tank, prepare the dip with a ratio of 1 part bleach to 20 parts water. Dip your plant into the solution for 90-120 seconds. If your plant is sensitive, lessen its submersion time. Ensure the plant does not stay longer than 2 minutes in the solution.
While the plant is soaking in the dip, prepare your rinse solution. Make dechlorinated water using a water conditioner added into the water.
Once the 2 minutes is up, remove the plant from the bleach dip. Rinse it in the dechlorinated water gently and thoroughly. Rinse the plant in a rinse solution for 3 minutes or until the smell of bleach is wholly removed.
You can now introduce the plant into the aquarium tank when you think all the bleach is removed.
Second Dip: Potassium Permanganate
Potassium permanganate comes in liquid and crystal forms. It helps prevent algae buildup in tanks. It is highly effective in killing parasites, pests, and bacteria.
For this dip, use a bucket full of warm water. Again, use safety gloves when handling the potassium permanganate.
If you are using the crystal form, mix in 4 mg of potassium permanganate for every liter of water. If you use the liquid form, a couple of drops per liter will be enough. Mix it gently until the solution becomes dark pink or purple.
Potassium permanganate loses potency when exposed to light. So keep away from direct light if you choose to do this dip.
Submerge the plant for 10 – 15 minutes. Afterward, rinse it gently and thoroughly in a rinse solution. Once done, it’s ready to go to your aquarium tank.
Third Dip: Hydrogen Peroxide
For this third dip, use 3% hydrogen peroxide. Mix 2 – 3 ml of hydrogen peroxide with a gallon of water. Submerge the plant in the dip for not past 5 minutes. Longer than 5 minutes can cause discoloration to the leaves.
Like the previous dips, thoroughly rinse the plant in a rinse solution. Then plant it in your aquarium tank.
Fourth Dip: Aluminum Sulfate
Dissolve 1-3 tablespoons of aluminum sulfate into a gallon of water for the last dip. The water should be room temperature or a little warm to dissolve the alum quickly. Know the sensitivity of your plant. The more sensitive the plant, the less alum you should use.
Soak the plant in the solution for 3 hours. Afterward, rinse it in a rinse solution and plant it into your aquarium tank.
Conclusion
Knowing how to disinfect aquarium plants is a must for aquarium keepers. You know your fish need them, and to ensure your fish’s wellbeing, you have to do it. But without proper disinfection, planting a new aquatic plant in your aquarium may do more harm than good.
The post How to Disinfect Aquarium Plants appeared first on Aquatic Eden.
]]>The post The Best Aquarium Plants to Reduce Nitrates for 2022 appeared first on Aquatic Eden.
]]>
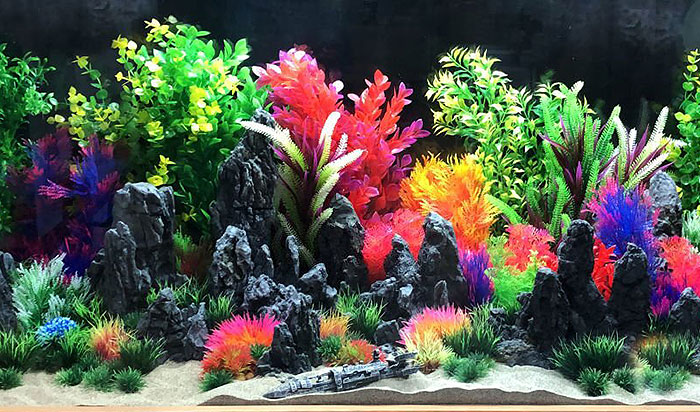
Do you want to up your aquarium game? Then you can start by removing all those tacky plastic plants and replacing them with real aquatic ones. Having real plants in your aquarium is more beneficial as such can give your fish a natural environment to live in.
Moreover, the best aquarium plants for nitrates can help by promoting a natural nitrogen cycle in the tank. It means that the plants will be dealing with the nitrates and ammonia that come from fish waste, resulting in less fouling and fewer water changes.
For you to get suitable aquarium plants to reduce nitrates for your fish tank, consider the tips and suggestions indicated in this article. Let’s start with product reviews first.
Best Aquarium Plants to Reduce Nitrates Reviews
1. Aqua L’amour Amazon Frogbit
One thing that impressed me about these plants is that they are already matured and established upon ordering. Each plant will have at least 2 leaves each. Meanwhile, their roots are around a foot in length. Although it is best to acclimate them, it is unnecessary to do any acclimation in a separate bucket. You can just throw them into your tank.
Another great thing about this plant is that it thrives without having to add extra nutrients to the water. This plant can survive in any aquarium setting. The only things they need are the nitrates that come from fish waste as nourishment. This means you do not have to add stress to your fish by adding nutrients into the water.
Unlike some aquatic plants, the Amazon Frogbits do not need CO2 constantly pumped into the water. It is one less tank accessory that you will need to get. Of course, these plants will appreciate the supplemental CO2, but they can do without it and still be fine.
Moreover, the plants that are the best nitrate remover for freshwater also do not need any fancy full-spectrum, high-wattage grow lights. Just your regular LED lamp will supply enough light for them to thrive. If the location of the aquarium gets several hours of natural indirect light, that would be enough to keep these plants happy.
The only problem with them is that they are somewhat sensitive to fluctuating temperatures. If these plants need to be shipped far, exposing them to the fluctuating ambient temperatures too much, they might arrive damaged, or worse DOA. Damaged plants upon arrival may be difficult to nurse back to health.
- Each plant is mature with 2-3 leaves each
- Does not need additional nutrients in the water
- No need for CO2
- Can thrive with just an LED grow light
- Spreads fast
- Delicate against temperature changes
If you are a beginner at taking care of aquatic plants, then these plants are ideal for you. They do not need any additional care aside from what you are already doing for your tank.
2. Aquarigram Leaf Amazon Frogbit

One thing I liked about this supplier of aquatic plants is that each order contains a lot of Frogbits recognized as among the best pond plants to reduce nitrates. You will be getting around ten or so plants with 2-3 leaves each. In a couple of weeks, these plants will cover the surface of your aquarium with very little maintenance to boot.
All of the Amazon Frogbits that I received had leaves that are, on average, the size of a quarter. In other words, they are already mature or well into the process of maturing. In just a couple of weeks, these plants will grow and spread quickly. If you have a small tank, then I think these plants will quickly cover the surface.
The plant provider takes good care of all the plants that they sell. The ones I received were packaged well. They come in a secure plastic container then wrapped in plenty of bubble wrap.
Aside from that, you know that the seller has years of experience with raising aquatic plants because there are no snails or any parasites that came with my Frogbits. However, I still put them in a quarantine tank for a week just to be on the safe side.
I also appreciated that Aquarigram put bonus plants with the items I ordered. I actually received two. I was glad that they added the bonus plants with my order as I would not have thought of getting them. Now, my following orders are for the bonus plants.
However, keep in mind that these Amazon Frogbits do not like long-distance travel, so if you are ordering from the opposite coast, expect that some plants may not make it. If some of the plants come with yellowed leaves, they can still recover.
- You will be getting a lot of plants in a single order
- Fully grown and well-established plants
- Careful and secure packaging provided for the plants
- Comes with bonus plants
- The plants are resilient and capable of recovering quickly
- The plants do not travel well
This supplier took good care of the plants from their end, like ensuring that there are no parasites or snails and that there is secure packaging for the plants during delivery. If the plants have to travel across the country to get to you, though, expect some of them to die or get damaged.
3. Wpmlady Aquarium Small Leaf Grass

One thing that I liked about this product is that you are getting 2 packs with each one containing a lot of seeds. This gave me quite a bit of confidence that these might grow. I had plenty of bad experiences with growing aquatic plants from seeds, so I generally steer away from those that do not provide enough seeds.
I also liked that you do not need to worry about where to get the seeds to sprout as you can use plain garden soil. I tried growing other ground-covering plants from seeds, and most of them are quite finicky when it comes to the soil used. I was successful in making these seeds grow using a regular potting mix, so I suspect anyone can do it as well.
Once the plants have grown and matured, they are pretty much low-maintenance. Unlike most high-tech aquatic plants, this ground cover plant does not require a CO2 system to keep the nitrate level for planted tanks pretty much within the normal range. The CO2 respired by the fish in the tank is enough to keep them green and healthy.
When you successfully make the seeds grow, they will provide a beautiful and dense ground cover that will almost look like a living carpet on the bottom of your tank. Once established, you do not need to do much with them. You can even take a portion of the cover and use it to start covering another tank.
The description says that these seeds will start sprouting in less than a week. The truth is, they won’t. It will take around two weeks before you can see anything green in the soil. This makes it not that suitable for beginners.
- Each pack contains a lot of seeds
- Can grow in regular soil
- Does not need additional CO2 pump or nutrients
- Effectively deals with the excess nitrates
- Provides a beautiful ground cover for any tank
- Takes a long time to sprout and mature
These plants are not recommended for beginners at growing aquatic plants. Anything that you need to grow from seeds can be a hit-or-miss situation. You will need a lot of time and patience to get these plants to grow and thrive.
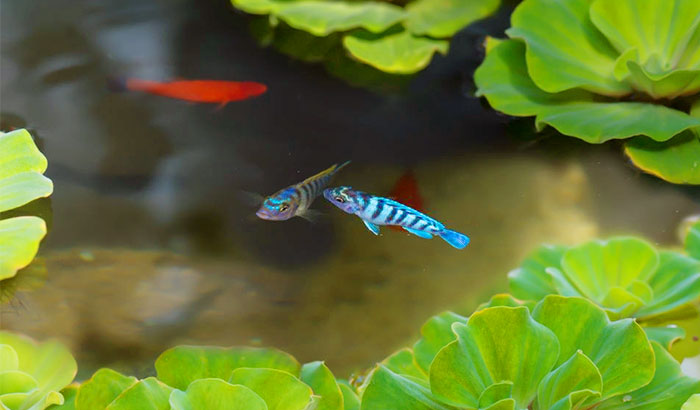
4. Aquarigram Leaf Water Lettuce

The nice thing about getting plants from Aquarigram is that they provide you with more than enough to ensure that there will be a few extras in case some will not make it.
Regarding the Dwarf Water Lettuce, you will also receive several plants – at least 12 leaves in total. Mine arrived with a couple of the leaves starting to turn yellow, but the plants managed to bounce back and grow.
I also liked that the company provided a bonus mystery plant with every order. The one I got from them was quite a beautiful plant. I do not know what its name is as it was not provided, but I will search Aquarigram’s listings until I can find it.
The reason why I got high nitrate-absorbing plants is that they are great at filtering out the excess nitrates and other harmful chemicals in the water. It has been years since I started my aquarium hobby and I wished that I knew about water lettuce back then. The plants prevent the water from fouling so I no longer need to replace it quite as often.
Aquarigram provides a guarantee that your plants will arrive alive. However, if they did not make it, the company will send you replacements for free. I haven’t had any bad luck with my orders so far. Thanks to their careful packaging and labeling, all my plants arrived alive and healthy.
However, if you live in a place where the ambient temperature can reach a high of 100 degrees F or can get down to 35 degrees F or lower, the plants might not survive the trip. If you are not at home to receive the package, the extreme outside temperatures can and will damage the plants.
- The package includes several plants with at least 12 leaves in total
- Includes a mystery plant as a bonus
- Helps remove the harmful chemicals in the tank
- Packaged properly, ensuring that the plants will arrive alive
- Provides a healthier environment for fish
- Not recommended if you live somewhere with extreme temperatures
Dwarf Water Lettuce provides a good surface cover for your aquarium or koi pond. You can expect them to work great for beginners as they are quite hardy and they spread relatively quickly.
5. Aquarigram Leaf Water Spangles

When the package arrives, you will be getting a couple of mature plants that have at least 50 leaves in total. This means you will be getting mature plants, not something that sprouted after just a couple of days. The plants I bought already had long roots. I needed to trim a couple of inches off so they could fit in my quarantine tank.
What I liked about water spangles is that they provide great hiding places for fish that you keep in a small pond. I have a small pond in my backyard, and it looks much better than if you don’t use any water plants at all.
My fish loved to hide under the water spangles in between the roots. It also gives the fry good hiding spots and significantly increases their survival rate.
These plants grow quite fast. I put mine in a quarantine tank for a week just to ensure there were not any snails or other parasites in the plants (and there weren’t any). While in there, the water spangles had a significant growth spurt. The leaves became more vibrant and they grew a little. There was also evidence of new growth.
These plants also did a great job keeping the nitrates level in my tank at a safe level. I do not keep any goldfish in my tank, just mollies and tetras, so the nitrate levels are not that high, to begin with. Still, the plants keep the water from getting too dirty, which means fewer water replacements.
Now, here is a word of warning about water spanglers. They are somewhat delicate. If you have an overhead water filter, it may not be a good idea to get these plants as the force of the cascading water is usually enough to rip off the leaves. It will then clog up the filter.
- Mature and established plants
- Provides excellent shade for fish in ponds
- Grows and spreads steadily
- Provides hiding places for fry
- Help keep the nitrate balance in the water
- These plants need more care than other floaters
Although the water spangler is not as hardy as frogbits, it is still a beginner-friendly water plant. You need to be careful about the small leaves as they might clog your filter.
6. Aquarigram Riccia Water Spangles

If you have a tank of goldfish, then you are probably aware of just how dirty their water can get. Placing a cover of Riccia water spangles in the tank will not only make the aquarium look a whole lot better, but also take care of the nitrates that came from the fish waste. In the case of a goldfish tank, the plants will thrive in such an environment.
Another thing that I liked about these water spangles is that they are hardier compared to other floating water plants. When I received my package from Aquarigram, the plants looked well, considering that they traveled hundreds of miles. I then placed the plants in my quarantine tank and was pleased to see that there were no snails or parasites.
Just like other floating water plants, these provide a lot of shade for the fish. Sometimes, the LED tank light can be a bit too bright for the fish. The plants help by diffusing the light before it enters the water. The roots of the plants also dangle into the water. They serve as perfect hiding spots for the fry and shrimps if you have any.
The plants are also quite fond of nitrates, even more so than other aquatic plants. This means you no longer need to change the water quite as often. It is like having a natural filter. Some hobbyists do not even use filters. They just rely on the plants for filtration and aeration of the tank.
Now the problem with these plants is that they have small leaves that tend to get clogged in the water filter. You will need to put some sort of mesh screen over the water intake or place some sort of floating barrier on the surface to prevent the plants from getting close to the filter.
- Likes nitrates
- Hardy and low-maintenance
- Provides good cover and food for little fish
- Supplies plenty of oxygen
- Spreads fast but the roots do not droop down as much
- The small leaves of these plants may clog your filter
The Riccia water spangles are ideal for beginners at aquascaping. They are hardy and do not need a lot of maintenance. Aside from that, they act like a natural filter that keeps the water clean.
7. Aquarigram Leaf Velvet Water Spangles

If you populated your aquarium with small and medium-sized fish, the velvet water spangles will give them the ideal living environment. The leaves are quite large and provide plenty of dark areas where the smaller fish and their fry can hide away from the other bigger fish. The roots also provide the bigger fish with additional food.
Another benefit of water spangles, in general, is that they are quite durable and low-maintenance. The velvet water spangles delivered to me were a bit worse for wear due to them having traveled a long distance. However, after just a couple of days in my quarantine tank, the plants rebounded and got healthy again.
Unlike the other aquatic plants I owned, these are quite durable. You do not have to worry about the leaves falling off due to the cascading water from the filter of the nitrate limitation planted tank. Also, even if the fish were to eat a good length of their roots, these plants would not mind it as they will grow back in just a couple of days.
Speaking of propagation, if you place a couple of plants in a tank and you make sure that they get enough indirect light, the plants will spread and cover the entire surface of the water. You may end up with dozens of individual plants in under a year.
Now, the only thing to remember about the velvet water spangle is that they need a bit more illumination than most other aquatic plants. Because of their rather large leaves, they will need a lot of light for photosynthesis.
You do not need to position your aquarium where it gets direct sunlight. It is inadvisable to do so as it will cause algae to form. Just make sure that the aquarium is in a well-lit room that is fine.
- Features larger leaves compared to other plants
- Easy to care for
- Hardy and durable
- Provides a lot of shade and shelter for the fish
- Easy to propagate
- Will need more light compared to other aquatic plants
This is yet another aquatic plant that is ideal for beginners. However, it propagates quickly, so you will find yourself pruning and removing plants every month or so.
8. Aquarium Plants Hornwort Bunch

The best thing about planting hornworts in an aquarium is that they work well in filtering out nitrates. After I planted the hornwort in my aquarium, the nitrate level fell by more than 50% in just a week. It made my entire aquarium low-maintenance. I only needed to replace a bit of water every week, unlike in the past when it is half of the tank.
I was a bit worried when the plants came as a good portion of the roots were brown and rotten. The plants have shed a considerable number of leaves. However, after a week in my quarantine tank, the plants rebounded and looked perfectly healthy.
I was worried that these plants needed a lot of sunlight because of the number of leaves, but that was not the case at all. I keep my tank in a dimly lit part of the house. There is only a LED lamp to provide light. The hornwort still looked vibrantly green. The plants I have grown so fast that they reached the top of my tank in just two weeks.
Another thing that I liked about hornwort is that you can anchor them to the aggregate base of the aquarium, allowing them to float on top of the water or both. I still enjoy them even if I would have preferred them anchored at the bottom, as I like watching them sway in the water.
The seller grew all the plants they sell in outdoor ponds and they like to keep things organic so they do not use pesticides. This means that your batch of plants may have snails or other parasites in them.
The seller carefully inspects each batch before shipping, but snail eggs can be quite small and almost invisible. To be on the safe side, keep your plants in a quarantine tank or a large bucket for a week or so. This will allow you to spot if there are any stray snails.
- Provides food and hiding places for small fish
- Great at filtering out the nitrates and ammonia
- Grows and spreads quickly
- Does not need that much light to grow
- Can be fixed at the bottom or allowed to float
- May come with snails as the seller does not use any pesticides
The hornwort is considered an invasive species, so be careful when you dispose of them. However, that does not take away from this plant’s inherent beauty and its excellent nitrate filtering capabilities.
What to Look For When Buying a Aquarium Plants to Reduce Nitrates
Are you a beginner when it comes to taking care of aquatic plants? Don’t worry. Unless the plant arrives at your home already dead, you would need to put some effort into killing them. However, some plants are more fragile than others.
Here are some things you should consider once you begin shopping for low nitrates in a planted tank.
Must Come from a Reputable Nursery
Don’t just get aquarium plants from anyone you meet online. They might be illegal plant poachers for all you know. There are even certain cases when people got into trouble just for possession of an endangered plant species.
Make sure that you are only buying from trusted plant nurseries. These are businesses that cultivate their stock of aquarium plants. They do not just scoop them up from their local ponds or lakes.
Must not Contain any Snails or Other Parasites
Here is a rule of thumb when it comes to buying aquarium plants. Always assume that they have snails. Even the most careful plant nursery can sometimes unintentionally ship a couple of snails along with the plants. The problem is that a couple of snails can turn into dozens in a short period.
The best thing to do is to put the plants inside a quarantine tank for a week or so. Not only will doing so acclimate the plants and allow them to recover their health, but it will also provide enough time for the snail eggs to hatch.
That way, you can pick off all the snails that you can see. If a week passes without any sign of parasites, then you can safely transfer the plants into your tank.
Must be Fully Mature
Never order plants that are just newly propagated. If you are looking for floating plants, make sure that each one has at least two fully-formed leaves and a good length of roots. If you want something that is anchored at the bottom of the tank, it should be at least half a foot long and has plenty of leaves.
Newly-propagated plants may not even survive the trip to your home from the nursery. You may only receive a container of brown rotting plant matter.
Should Come from Somewhere Close by
Ideally, you should buy from a local aquatic plant nursery if possible. It will ensure that the plants you get will reach your home alive.
However, if there are no reputable sellers in your area, you can shop for plants online. Just be sure that they are not too far away. Getting aquatic plants from across the country is almost a guarantee that the plants will have severe damages or become dead-on-arrival.
Choose a Hardy Species
If you are a beginner at taking care of aquatic plants, you must choose a plant species that is resilient and low-maintenance. There are not that many high-maintenance aquarium plants out there, so avoiding them should be easy.
Do your research to find beginner-friendly plants. Also, avoid the “high-tech” plants for now until you are a bit more Experienced and willing to spend on them.
Choose Plants Suitable for The Fish in your Aquarium
This will depend on the size and number of fish you are keeping in your tank. If you have small fishes, like mollies, tetras, and the like, you can pick whatever kind of plant you want.
These tiny fishes can flit through even the thickest of growths. On the other hand, if you have goldfish, get plants that grow quickly because they also eat plants.
Frequently Asked Questions
What Aquarium Plants Absorb the Most Nitrates?
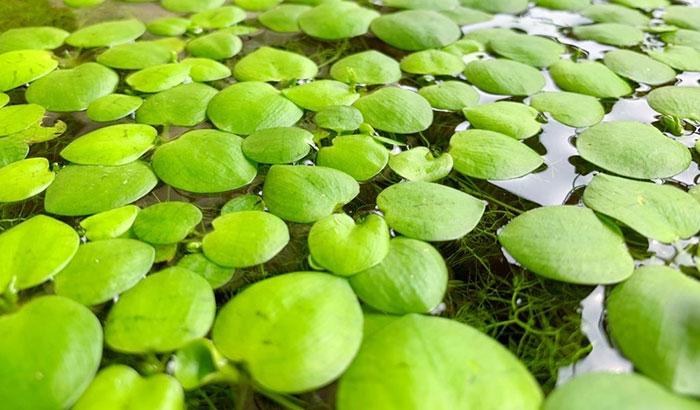
Undoubtedly, the aquarium plant that absorbs the most nitrates is the duckweed. This is why most low-tech aquarium hobbyists use this plant to keep their non-filtered, non-oxygenated aquariums thriving. Other great nitrate-filtering plants include frogbits, marimo moss balls, water lettuce, water sprites, and others.
How to Reduce Nitrate in an Aquarium with Plants?
An easy and aesthetically pleasing way to reduce the number of nitrates in the water is to plant aquatic plants in the tank. Instead of the soil, aquatic plants get their nutrients, which happen to include nitrates, directly from the water.
Having aquarium plants can effectively cut the nitrate levels by more than half in just a week. It will continue going down as the plants grow more.
Conclusion
Nitrate levels are a constant problem that plagued traditional aquarium setups for years. If you want to keep an aquarium but prefer an easier way to keep the nitrate level in check, get the best aquarium plants to reduce nitrates.
There are many different species of water plants available right now. However, you can’t consider all of them as the best plants for nitrate removal. Choose the plants that are right for your experience level as an aquascaper as well as the number of fish that you are keeping in the tank.
The post The Best Aquarium Plants to Reduce Nitrates for 2022 appeared first on Aquatic Eden.
]]>The post The Best Driftwood for Aquariums in 2022 appeared first on Aquatic Eden.
]]>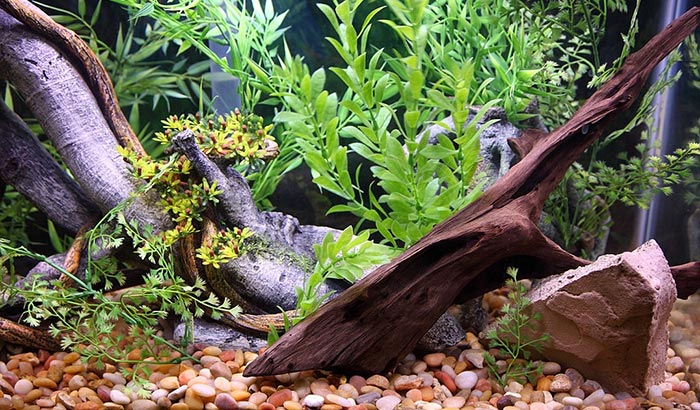
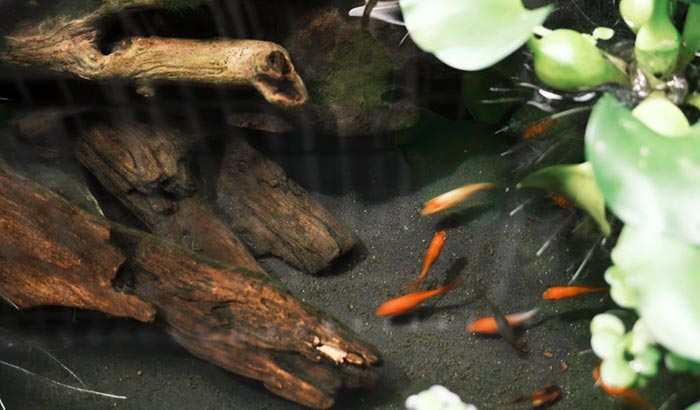
Using driftwood in aquariums has always been popular among aquarists. The reason is that the best driftwood for aquariums comes with many different benefits – among which are decorating your tank and providing plenty of hiding places that, ironically, make the fish want to stay in the open more.
Another of the many driftwood aquarium benefits is that it helps the aquarium’s water chemistry. Just like the substrate and sump tank (to a certain degree), good aquarium driftwood branches allow the growth of nitrifying bacteria and other beneficial microorganisms to grow and thrive.
In this article, you will learn how to shop for the ideal driftwood that you can use in your aquarium. Aside from saving a lot of money, you can also spare yourself from having to deal with the loss of countless numbers of fish. If this sounds good to you, then you must continue reading.
Best Driftwood for Aquariums Reviews
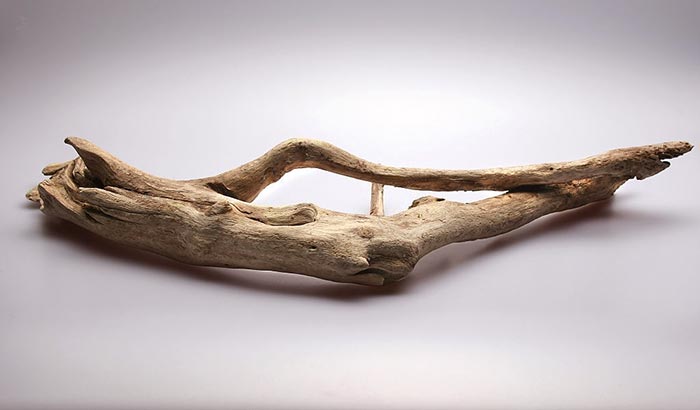
1. PINVNBY Natural Aquarium Driftwood

I was a bit apprehensive when I first ordered driftwood online, but this product proved all my apprehensions wrong. I received three beautiful pieces of driftwood. All of them had nice colors and featured twisted and knotted limbs. They looked even better after I treated them and positioned them in the middle of my tank.
Although each piece of driftwood is unique, the sellers handpicked every piece that goes on sale to ensure that each one is aesthetically pleasing. You will not be getting driftwood that will make you question your tastes and aesthetic sensibilities. I loved the ones that I received, so I am pretty sure that you will fall in love with them, too.
The driftwood pieces I received have a lot of gnarly protrusions, making the entire thing look like a miniature dead tree. The numerous protrusions look like small twisted branches that are ideal hiding spaces for fish. I stuck a bit of moss on the “branches” to make it look like submerged bonsai and it looked great.
Yes, the driftwood made my aquarium look better, but that is only secondary to the actual reason why I got them. I got tired of losing fish because they died due to the stress of the other fishes chasing them. These driftwood pieces with all their gnarly protrusions provided a lot of hiding places for the smaller fish.
The problem with this product, which is true with all driftwood, is that you have to prepare it before placing it in your aquarium, and it could take more than a week. This means that driftwood is not for those who do not have a lot of patience. If you forego this step, then you risk the lives of your fish.
- Made of real solid wood
- Hand-selected pieces in every package
- The driftwood pieces are beautifully non-uniform.
- Provides ample hiding spaces for small fishes and fry
- More affordable than retail driftwood
- Takes a bit of preparation before use
If you are thinking to yourself that your aquarium needs something to make it look complete, then you should try putting a piece of driftwood or two in it. Driftwood is the perfect centerpiece for any aquarium. You are giving an organic touch to the tank while also offering aid in balancing the water chemistry.
2. SubstrateSource Cholla Wood Driftwood

The thing that I liked the most about cholla driftwood is that it comes with beautiful patterns and shapes. They look like hollow wooden tubes that have holes carved on the sides. If you want to give your aquarium a different yet still intriguing look, this is what you need.
Aside from giving your aquarium an organic feel, cholla driftwood makes excellent anchor points for aquatic plants. I tied a few of my favorite plants on a couple of cholla driftwood and they easily took root. I discovered that these worked better than just sticking the plants into the substrate.
I got three pieces of cholla driftwood and all of them are approximately 4 inches long, and it may seem too small for a 50-gallon tank, which it is, but it is the perfect size for a small tank. Anything between 5- to 20-gallons would work perfectly for these pieces of driftwood.
Even though it is not technically wood, cholla has a rough and porous texture that attracts the growth of nitrifying bacteria and biofilm. In addition, certain fishes and shrimps use cholla as sources of food. I have a tank full of cherry shrimp, and they swarm all over the cholla driftwood.
If you will be placing a piece of dried cholla wood inside an aquarium, make sure that the holes are big enough for your fish. I made the mistake of not checking and lost a couple of fish because they got stuck inside the small holes of the cholla driftwood.
- Naturally comes with beautiful patterns
- Makes an excellent base for aquatic plants
- The sizes are perfect for small aquariums
- Perfect for shrimp and other small invertebrates
- Attracts and encourages the growth of natural biofilm
- Not an ideal hiding place for fish
Cholla wood has an intriguing look to it, but it is not ideal for tanks with small swarming fish as they can get stuck in the holes. However, if you are keeping cherry shrimps and the like, these are the ideal habitats for them.
3. Aquatic Arts Sinkable Aquarium Driftwood

The nice thing about this product is that I got more than what other sellers provided. This package came with four, five-inch-long chunks of cholla driftwood and they are significantly larger than the other ones that I purchased before. Having more driftwood and larger pieces at that means that more decorating options would open up.
If you will be using the cholla driftwood for other purposes aside from aquarium decoration, you do not need to worry about initial preparation. The cholla driftwood pieces are already treated and had all their thorns removed. You can use this product straight out of the box.
Speaking of other uses, I bought another package of this stuff because I liked the way they looked and I thought that they would make great planters for my air plants, and they did. I also used a couple to make table centerpieces. I used the others as accents for my succulent dishes.
I do advise that you constantly monitor your aquarium’s water condition often as the driftwood may cause the pH level to drop too much, thereby increasing the nitrate amount. This does not happen all the time. It only happened in one of my tanks but it is still better to be on the safe side.
- The package contains four large pieces of cholla driftwood
- Already prepared and usable out of the box (but not for aquariums yet)
- Has multiple other uses
- Helps lower pH levels gradually
- Allows the growth of essential bacteria and biofilm
- Can lower the pH level of the water too much
Although this product, and all driftwood freshwater aquarium options in general, can lower the pH level of the water in the aquarium, you can compensate for it by using additives anyway. For me, adding one more minor task to my aquarium maintenance list is worth it for the added benefits provided by this product.
4. WDEFUN Natural Coral Driftwood

The seller says that you will be getting two pieces of driftwood that are between 9-14 inches long, and they are not kidding around. I got one piece that is just a bit over 14 inches long and another one that is more than a foot long. I have a 55-gallon tank and the two are just the right size for it.
This driftwood for fish tanks is hand-picked so you can be sure that what you will get will be beautiful and beneficial to your fish. The ones I got were nice and gnarly, with a lot of twists and bends that served as hiding spots for my fish. Because they felt safe inside the aquarium, the fish stayed out in the open more often than before.
Because of all the twists and crevices, the driftwood has a lot of surface area despite its size. This encouraged the growth of biofilm and nitrifying bacteria on the driftwood. The driftwood made the aquarium environment a whole lot healthier, which made my fish happier and more active.
I also like the natural deep-red colors of the driftwood. They contrasted well against the rest of the aquarium, making it the focal point of the setup. I do advise you to let the driftwood soak in a bucket of water for a week or two to remove the tannins in them. Don’t worry as the driftwood will retain its vibrant red color.
Now, I would like to mention that you will be taking a bit of a gamble. You may get two large driftwood pieces or one that is big and the other one smaller than expected. If you are unlucky, and the person responsible for filling your order is having a bad day, then you might get two pieces that are smaller than what you have wanted.
- Comes in large pieces
- Has a deep red coloration that contrasts well in an aquarium
- Comes with several nooks and crannies for fish to hide in
- The large surface area encourages the growth of bacteria
- Ideal for use in terrariums and home décor
- Kind of a gamble when it comes to size
Despite the odd chance of you getting small driftwood pieces, you will be getting quite beautiful specimens that will look great in any aquarium. I was fortunate enough to get two good-sized pieces of driftwood, so I was quite pleased with my purchase.
5. Hamiledyi Branches Decoration Driftwood

The thing I liked the most about this seller is that you will be getting five pieces of natural driftwood for aquariums per order. I was lucky to get pieces that were mostly above 7 inches long, so I had no issue on that front.
I was also planning on joining the driftwood together to form one large driftwood for the aquarium, so even if I did get small driftwood, it would have been fine as well.
As mentioned, the reason I liked this product is that you will be getting five pieces of driftwood, which is a good thing if you are into the hobby of aquascaping. I joined the pieces together to form a sort of underwater bonsai, with moss for leaves, and the pieces looked perfect with each other.
Aside from aquarium uses, I also had a couple of crafty ideas for these driftwoods. There were a couple of pieces that were particularly lovely and slender, so I stabilized them using resin and turned them into pens and knife handles. The grain pattern in every one of them was quite beautiful as well.
Once properly prepared and all the tannins leached out, these driftwoods will drastically improve the health of your aquarium. I had mine for a month or so and the amount of ammonia and nitrates are always in the low levels.
As mentioned earlier, you will get five driftwood pieces that were randomly picked out, so you might get five pieces that are the perfect size and look for your purposes. On the other hand, there is also a chance that you will be getting five pieces that are not as nice-looking as you wanted them to be.
- Provides five pieces of driftwood
- Ideal shapes and sizes for aquascaping
- Has other uses and applications
- Promotes good aquarium health
- Every piece looks beautiful
- Varying sizes and quality
Do take note that you will be taking a bit of a risk by ordering driftwood online, mainly because you are not able to choose the ones you will buy. With that said, with this seller, you can return your items and have them replaced, so you do not have to worry too much about not getting the kind of driftwood you wanted.
6. Tfwadmx Natural Driftwood

The nice thing about the small driftwood for an aquarium that this seller provides is that they are quite beautiful and come with a lot of bends and curves, which my fish loved. There are lots of knots and bends in the branches, providing more hiding places for the smaller fish, so they will not coop themselves up in one corner.
The driftwood this seller supplies is also sturdy enough for use in a terrarium containing larger reptiles like iguanas or small ball pythons. They are already pre-treated so there are no harmful toxins or chemicals in them, making them perfectly safe for your pets.
Aside from decorating aquariums and terrariums, you can use these driftwoods in other applications, especially the ones that have a lot of character. For instance, I took one of the driftwoods I received and used it as a centerpiece for a succulent dish that I was working on, and it looked great.
Aside from providing aesthetic appeal to your spider driftwood aquarium, the driftwood also helped improve the water chemistry in my aquarium. Thanks to it having a lot of curves, bends, nooks, and crannies, there are lots of surfaces where nitrifying bacteria can grow and multiply. It helped keep the ammonia and nitrates down.
It does not happen all the time but there have been quite a few reviews that mold easily grows on the driftwood. I decided to boil the driftwood for a couple of hours several times, soak it in some water with hydrogen peroxide for a couple of days, and finally a one-week soak to get rid of tannins.
- The driftwood comes with lots of bends and cavities
- Sturdy enough for reptiles in terrariums
- Ideal for use on other applications
- Improves water chemistry when prepared properly
- Comes in a variety of reddish-brown tones
- Needs to be boiled and soaked much longer than others
Although these driftwoods needed more in terms of preparation, they do provide a lot more benefits aside from just aesthetics. If you want your fish to always be healthy and happy, which is what you want, of course, then you should check this product out.
7. My Pet Patrol Natural Untreated Organic Driftwood

This might just be the biggest cholla driftwood I have bought online. I have bought cholla driftwood from other sellers before and they were not as big as the teddy bear cholla. These are the perfect size for aquariums with small fish like bettas, mollies, tetras, and the like.
Aside from providing shelter and hiding spaces for the fish, they also add aesthetic appeal to any tank. The cholla driftwood looks like an artist meticulously carved patterns in a hollow piece of wood. If you are thinking of setting up a new aquarium, consider using this as your centerpiece.
Because of the innumerable holes in the driftwood, the cholla is also the ideal environment for cultivating beneficial bacteria and biofilm. The bacteria will help in naturally controlling the amount of ammonia and nitrates in the water while the biofilm serves as food for small crustaceans and certain types of fish.
Aside from tannins that are relatively harmless, you do not need to worry about toxic chemicals leaching out of the driftwood and poisoning your aquarium. Just like most other types of driftwood for aquariums, these teddy bear cholla driftwood are untreated and sun-bleached, so no harmful chemicals may contaminate your aquarium.
Speaking of tannins, this teddy bear cholla driftwood has a lot. I went through quite a lot of tasks before it became safe for use in my aquarium and it still seemed that lots of tannins were leaching out of the wood. It came to the point that the ends have started to fray.
- Large diameter driftwood
- Boasts of a beautiful lace-like pattern on the outside
- Ideal for improving and maintaining healthy water chemistry
- Untreated and does not contain any chemicals
- Has a lot of other uses besides aquariums
- Contains a significantly higher number of tannins compared to other driftwood
Although this driftwood does need a bit more preparation, it would be a worthy compromise considering that you will be getting a great-looking addition to your aquarium that also serves quite a lot of purposes.
8. DoubleWood Decaying Trunk Driftwood

This somewhat looks like real driftwood but it also kind of feels like real driftwood, though it is not. This product is just a facsimile made of resin, but it does look like the real thing. It does the same things too. However, unlike real driftwood, you do not need to soak this in a bucket for a week.
Don’t worry about this product being made of resin. It is safe for your fish and other aquarium denizens. This aquarium ornament uses food-grade resin and it will not leach chemicals or other toxins into the aquarium water.
You will also be getting two pieces – one is larger than the other. The larger one is just the right size for smaller cichlids and the other one is good for bettas, tetras, and the like. The larger one is also the perfect size for some of the larger 40- to 50-gallon tanks
This product also comes painted using non-toxic pigments, giving it a somewhat realistic look. You can probably tell that it is fake when you inspect it thoroughly, but when it has been in your tank for a couple of months, it will look natural.
However, what I did not like about this product is the shoddy quality control that it went through. The pieces that I got have sharp mold lines that would easily slice fish open. I also noticed some jagged edges. I had to sand down the dangerous bits before I placed the ornament in my tank, which, fortunately, did not take long.
- No need to soak in water beforehand
- Made of non-toxic, food-grade resin
- Perfect size for small and medium-sized fish
- Strikingly natural-looking color
- The set comes with two pieces of driftwood
- There are jagged edges and sharp mold lines
Although you do not need to soak this product in water, it is also unnecessary to do a bit of work to sand off the sharp mold lines and jagged edges. This product might not be real driftwood, but if you have a tight budget and you still want to make your aquarium look good, this would be a good choice. Just keep an eye on it.
9. Majoywoo Natural Driftwood

You will be getting genuine and all-natural driftwood. These pieces of wood are not treated in any way, so it will be up to you to make them safe to use in your aquarium. However, once they are ready, they will add a lot of natural beauty and charm to your aquarium.
Aside from decorating your aquarium, these driftwood pieces are useful for other purposes. If you have a reptile or tarantula terrarium, you can place driftwood in it to give your pet something to crawl on. A favorite of mine is to use driftwood as a focal point when I make succulent arrangements.
You will notice that your fish will be staying longer in the middle of the tank after you place a piece of driftwood or two in your aquarium. I noticed this a couple of days after I placed driftwood in my aquarium. Because they know that they can easily hide from the other fish who are bothering them, they can confidently stay out in the open.
The nice thing about buying driftwood is that you cannot guess what colors you are getting. I ordered two packages, which meant I received four pieces of driftwood, and they looked great. Two had deep brownish-red shades while one was off-white with a bit of brown. The other one was almost jet black.
With that said, you will be taking a gamble when you buy driftwood online, mainly because you are not the one picking out the pieces. You might get lucky and get two pieces that exceed a foot in length but you may also get a pair of twigs.
- All-natural driftwood
- Has a lot of bends and spaces where fish can hide
- Has various other uses aside from aquarium décor
- Help keep your fish happy
- Comes in vibrant colors
- You will be taking a gamble when it comes to the size
Although it is uncertain what kind of driftwood you will be getting, you can be sure that you are receiving the real deal. On the other hand, if you are creative, you can make do with the pieces of driftwood that you receive. The most important thing to remember, though, is that you should prepare them properly before using them.
10. Beautgreen Natural Driftwood

Unlike other sellers, this one provides nice-sized driftwood pieces. The ones I got were all more than 6-inches long. All of them were also the perfect sizes for my aquarium. In addition, the driftwoods I got were quite bulky, not twig-like, which made them great for my cichlid tank.
Although you do not get to choose the driftwood you buy, you will be getting quite a lot of different colors. The ones I got were quite nice. There were a couple of browns, some were reddish-brown while others were off-white. They added a lot of color and character to my tank, and I will surely be adding more.
Another neat thing about this product is that you are getting six pieces. For a 20- to a 25-gallon aquarium, they are more than enough. Those six pieces provided enough shelter and hiding spaces for my fish, which paradoxically made them want to hang out in the open more.
Another use I found for these pieces of driftwood is that they serve as a base for my live plants. I threaded a couple of plants through the holes in the driftwood, and they have happily taken root and are thriving until today.
I did not have any problem with the product personally but that is because I already know that I needed to prepare the driftwood beforehand. However, if this is the first time you will be using driftwood, the included instructions will not help. They may even mislead you into making serious mistakes.
- Nice-sized pieces with lots of character
- Excellent colors that contrast well against most aquariums
- Provides lots of spaces where the fish can hide
- Useful for holding live plants
- Great customer service
- The instructions are somewhat incorrect
You may need to forgive the seller for the wrong or incomplete instructions as this driftwood came from China. Do your research to find out how to properly prepare driftwood for use in your aquarium, so you can spare yourself from the heartbreak of having fish die on you.
What to Look For When Buying a Driftwood for Aquariums
Before you purchase the first driftwood for your aquarium, you should consider the following so that you will be getting the best value for your money.
Size and Shape
Although you do not get to choose the size and shape of the driftwood that you will be getting, you will have an idea of what you can buy based on the customer reviews. Most customer reviews come with pictures and videos of the products they purchased. You may also be getting similar driftwood.
Customer Response
Speaking of customer reviews, does the seller have mostly positive reviews, or are they mostly from complaining customers? If you do not want to share the same fate as other people, you need to learn from their mistakes. If you find that a product has a lot of negative reviews, you should probably avoid it and vice-versa.
Real Driftwood or Faux Wood?
Real driftwood for aquariums will take a long time to prepare. Most of the time, it will take more than a month before all the tannins leach out of the wood.
If you do not want to wait that long, you can choose to use faux driftwood. These products are made of resin and will be ready to use straight out of the box.
Price
Here’s the deal, driftwood will be a bit on the expensive side. Prepare to pay around $50 for a couple of pieces when you buy them online. Now, if you want to choose driftwood, the best place to buy driftwood is your local aquarium supply store, but prepare to pay a higher price.
Frequently Asked Questions
How to Make Driftwood Safe for an Aquarium?
True driftwood will contain a lot of tannins and they are dangerous for aquariums because they tint the water and lower the pH level too much. To make the driftwood safe for your aquarium, you will need to boil it for an hour a couple of times then soak it in a bucket of water.
Continue soaking the driftwood and change the water when it gets too dirty. When the water remains clear and the driftwood sinks to the bottom, it is safe to use in your aquarium.
Why is Aquarium Driftwood so Expensive?
Some specimens, like manzanita driftwood, often sell for over a hundred dollars apiece. Driftwood is not just dried-out wood. It is also wood subjected to numerous cycles of drying and soaking over a long period, sometimes years.
If you live close to a river, you can walk along the bank and probably pick up a couple. On the other hand, you might not find beautiful Malaysian driftwood in your local stream.
Conclusion
The best driftwood for aquariums is not just a decorative piece. It also plays a part in maintaining the good health of your tank and the fish that live in it. This is why you should seriously consider getting a piece or two of driftwood.
Since driftwood can be quite expensive, you need to know how to choose the right ones for your aquarium. Now that you have reached the end of this article, it is safe to say that you already know all the things that will help you make the right choice.
The post The Best Driftwood for Aquariums in 2022 appeared first on Aquatic Eden.
]]>The post Benefits of Plants in the Aquarium appeared first on Aquatic Eden.
]]>
While surfing around the other aquarium websites on the internet, most dealing with fish only freshwater aquariums, I noticed that a large part of keeping a fish only aquarium is trying to overcome the drawbacks of not having live plants. It also made me realize how hard it was to actually keep fish when I still had a fish only aquarium. Diseases such as Ich were commonplace, and although the medicine was available to treat the diseases, I still invariably lost a few fish along the way. This never struck me as strange until now. Instead of desperately trying to keep the fish alive, in a planted aquarium the goal shifts to keeping the plants happy. If the plants are happy, the fish thrive. This is due to the immense benefits that keeping live plants in an aquarium can bring, including:
Aeration – Fish only aquariums are often aerated with an airstone in a desperate attempt to keep oxygen levels high so fish can breathe. In a planted aquarium, as in nature, the live plants provide all the oxygen your fish will ever need through photosynthesis. An airstone and air pump (and all the noise and vibration that go along with them) are unnecessary in a planted aquarium.
Filtration – Power filters, sponge filters, and canister filters are the only means of filtration in a fish only aquarium. It’s up to these filters to remove all fish waste and waste produced by excess food. This is achieved through mechanical filtration, chemical filtration (via carbon), and biological filtration (via bacteria growing on the filter media). There are many designs of filters out there and some are better than others, but all suffer from one flaw: if not cleaned properly and regularly, their effectiveness drops. In a planted aquarium, on the other hand, only mechanical filtration is truly needed. Plants can handle chemical and biological filtration fairly well. They absorb chemicals that are harmful to fish (in fact they live off of the chemicals produced by fish waste) and provide a perfect medium for beneficial bacteria to grow on. Of course, plants have their limits of filtration as well and most planted aquariums have a back up filter providing mechanical and biological filtration. Chemical filtration in the form of carbon will remove beneficial compounds and fertilizers needed by plants, and is not advised for a planted aquarium.
Protection – In fish only aquariums, the focus is the fish themselves, and their environment can be somewhat neglected. Not having enough protection can cause fish to be stressed and more succeptable to disease. Although artifical decorations and plants can be bought and put in the aquarium to provide protection and cover for fish, they are inferior to real plants in many ways. First, they provide none of the benefits listed so far aside from a location for beneficial bacteria to colonize. Second, they are much more likely to injure fish. Live plants aren’t hard and don’t have sharp edges like plastic plants can.
Food Source – The only source of food in a fish only aquarium is the owner of the aquarium (aside from algae for algae eaters). That means the fish are entirely dependent on you and the food you give them. If you don’t make wise choices and vary their diet, they may not be as healthy and can become more succeptable to disease. Also, if you forget to feed them, they have no alternative food sources. In a planted aquarium, the fish have a choice. Although not all fish will eat plants, most will pick at the leaves and dead or dying plant matter if no other food is available. It also helps to vary their diet. Many fish are omnivorous and need to eat plant material.
Algae Prevention – Algae is often a problem in fish only aquariums, and although keeping algae eaters and scraping the glass with an algae scraper are ways of combatting some algae, other types of algae are more stubborn. Algae occurs because there are nutrients in the water and there is light (even low light). In a planted aquarium, plants can outcompete algae and use up all of the nutrients in the water. Although this can open up a whole other can of worms while you try to get your light levels and nutrient levels right, once you get your planted aquarium balanced, you will most likely never have to clean the glass or pull algae off the gravel again.
Conclusion
And there you have it. These are only the practical benefits I can think of, there are many many more benefits to owning a planted aquarium, and it’s easier than you may think. Even just a few floating plants can make a serious impact in the health of your fish and the tank as a whole. So what are you waiting for? Throw out that noisy air pump and dirty airstone, toss the neon pink plastic plants and cheesy castle decoration, and take the plunge into a planted aquarium. Your fish will thank you!
The post Benefits of Plants in the Aquarium appeared first on Aquatic Eden.
]]>The post How to Attach Java Fern to Rock appeared first on Aquatic Eden.
]]>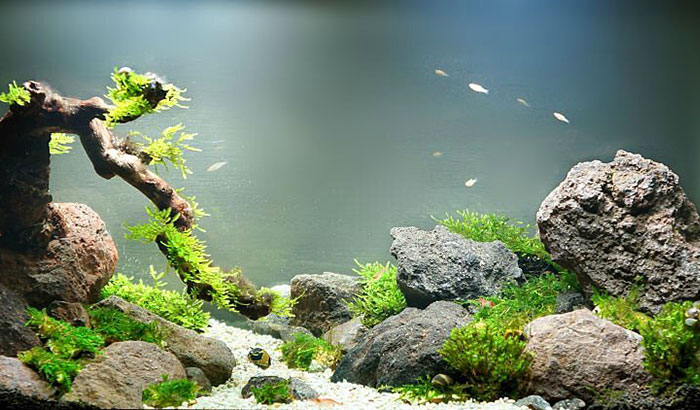
How to Attach Java Fern to Rock
Adding a Java Fern into the aquarium is the easiest way to make your fish tank lively and full of life. The Java Fern is a practical choice because this freshwater plant can be attached to a rock and be an excellent addition to your aquarium.
But how to attach Java Fern to rock? This article will present a very easy method of attaching Java Fern to rock. It only uses simple materials and can be done quickly for your convenience. Please see our step-by-step guide below:
What to Prepare:
- Java Fern (3 to 4 inches in height)
- Aquarium Rock in Different Sizes(Preferably with Structure)
- Cyanoacrylate Glue
Step 1: Preparation of the Aquarium Rock
You will need to prepare the aquarium rock before attaching the Java Fern to it. First, cleaning the rock is very important. You can wash it by rinsing it under hot water. This step will not only remove the dirt but also remove germs and parasites.
Once the cleaning has been done, let the rock dry. You can use paper or cloth to help the rock dry quickly. Just make sure that everything is clean with no dirt by checking it one last time.
Step 2: Attaching the Java Fern
Once the rock is ready, you can start preparing the Java Fern for the attaching process. Always remember that this plant should be around 3 to 4 inches in height. If it comes in a pot, you can remove the pot and the rock wool while cleaning the roots with water,
Once the plants are prepared, you can put some glue on the rock’s surface. Put the glue in the place where you want to position the plants. For large rocks, you can segregate each plant so that it is properly distanced from one another.
During the attachment process, the moment you put the glue on the rock’s surface, put the rhizome of the java Fern immediately. Hold the plant steady for a few seconds until it becomes stable. This super glue dries quickly, which means the attachment process can be quick for each plant.
Step 3: Keep on Watering the Plants
The moment you start that attachment process, do not forget to water the plants that are already attached to the rock. You can use your bare hands to sprinkle some water into the plants to make them stay wet. Then, proceed accordingly until everything is finished.
If you are attaching a smaller aquarium rock, you can put one or two plants only, depending on your preference. It is also better not to cover everything on the rock surface. Just segregate the plants to make them more balanced.
Another trick that you can do is do the attachment process underwater. Since the superglue that we are using can work underwater, then there is no problem with doing the attaching process under the water as well. Once everything is attached, prepare the flowers for transfer to the aquarium.
How to Attach Java Moss to Rock
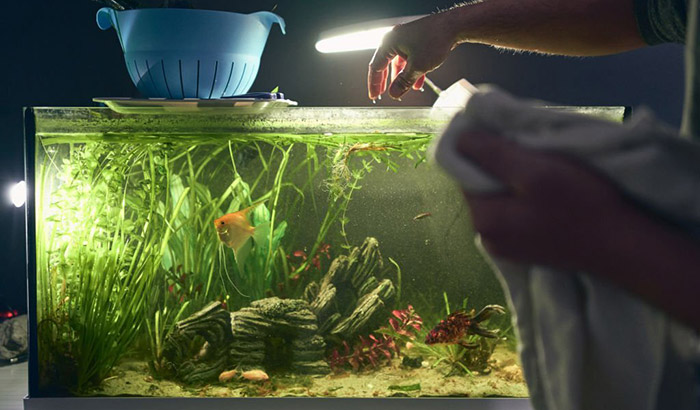
The Java Moss is also an excellent addition to your fish tank because it has the ability to be attached to a rock. When attaching Java Moss on a rock, it generally has the same process as attaching the Java Fern. Please see our guide below:
- Java Moss
- Coral Rock
- Super Glue
Step 1: Cleaning and Preparation of the Rock
The initial step is to prepare the rock before the attaching process basically. You can try to rinse the rock with hot water in your faucet to remove all the dirt. This step is also good for killing any parasites or bacteria living in the rock.
Once the cleaning is finished, you can let the rock dry. Using a piece of cloth or tissue paper can help the rock dry fast. Make sure to check everything is clean before proceeding to the next step.
Step 2: Attaching the Java Moss to the Rock
During the attachment process, you will just put the glue on the rock and not on the Java Moss. The idea is to distribute the moss into the rock evenly. Once it starts growing, the rock will eventually be covered by the Java Moss.
Please take note that the glue will only take 1 to 2 minutes to dry, which means you will need to attach the plant immediately after putting the glue on the rock’s surface. There is no rule on how much glue you can use but make sure that the Java Moss is properly attached to the rock.
Step 3: Putting the Rock into the Aquarium
Once everything is attached, you can now proceed with putting the rock into the aquarium. The ideal place for the rock is in the corner of your aquarium. If you see some moss is removed, do not bother it because it is just normal.
Just proceed with placing the rock in the corner of the aquarium before leaving it. Expect the moss to grow and cover the rock as days go by eventually.
Conclusion
Learning how to attach Java Fern to rock is a good skill to have because this plant adds a new dimension to your fish tank. Its ability to be attached to a rock makes it ideal for any fish tank. Meanwhile, a Java Moss can also be used similarly for your fish tank to make it more lively for the fish.
The post How to Attach Java Fern to Rock appeared first on Aquatic Eden.
]]>The post Christmas Moss vs. Java Moss: The Subtle Contrasts appeared first on Aquatic Eden.
]]>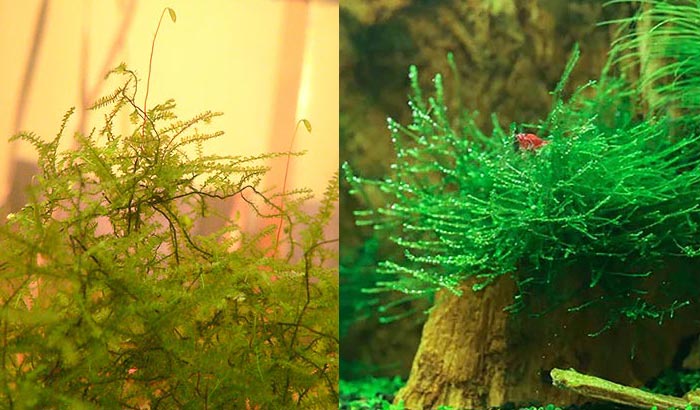
Any avid aquarium keeper would want the perfect greenery in the tank. Aquarium mosses not only add to the ambiance of the tank but also contribute to the well-being of the inhabitants.
Narrowing down your options to Christmas moss and java moss, you want to know the difference between the two. In this article, we will compare Christmas moss vs. java moss. We will study how to differentiate the two in appearance, care, and maintenance, which surface they grow best, and how they can benefit the fish in the tank.
Java Moss Vs. Christmas Moss
There are subtle differences between Christmas moss and java moss even when you look from afar. To identify them, we will look closely and compare java moss vs. Christmas moss.
How They Differ in Appearance
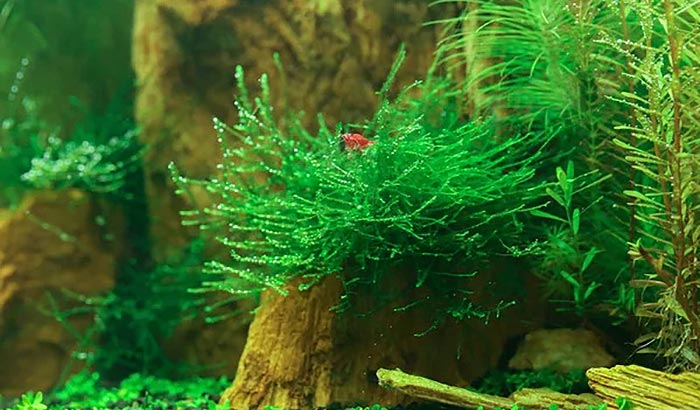
The Christmas moss has its name coined due to the fact that it resembles the branches of a fir tree. It has round leaves with branches that branch out at an almost 90-degree angle with the stem.
It is the ideal moss if you want it to carpet your aquarium tank. Like Bermuda grass on land, it grows fast and flat. It is denser and broader, perfect for covering large surface areas.
If you do not need a carpet on your aquarium floor, you can always let it coat driftwoods and other surfaces in the tank. But you might want to consider that it can grow up to four (4) inches long.
While the java moss also has a stringy appearance, it looks more like a fern than a fir tree. It has oval leaves that would branch out like grass.
The java moss grows much slower than the Christmas moss, but it grows longer, up to 10 inches in length. It can attach itself to all sorts of surfaces, although not necessarily to get nutrients.
Their Ideal Water and Temperature
To thrive, the Christmas moss requires warm water. Keep the temperature at 18 degrees C (66 degrees F) to 26 degrees C (78 degrees F). Maintaining the water temperature at this level will ensure the Christmas moss’s fast and healthy growth.
It is a freshwater moss that needs the pH level of the water to be between 5.5 to 8. To ensure healthy and fast growth, add a healthy supply of carbon dioxide to the list of requirements. Without supplementation, the Christmas moss will grow slower than the java moss.
The java moss is not very picky when it comes to temperature and water conditions. It can survive in both harsh and amicable conditions. But if you want something stable, you can opt to keep the water temperature at 20 degrees to 24 degrees C (68 – 75 degrees F)
The java moss is also a freshwater moss, and similar to the Christmas moss, you would want to keep the pH level of the water between 5.5 to 8. Additionally, you can blow some carbon dioxide into it to stimulate growth but do not be concerned if this is impossible. It does not necessarily need carbon dioxide to thrive.
How to Care For and Maintain

When it comes to caring, the java moss is much easier to manage than Christmas moss. Christmas moss needs constant supervision to grow and survive. You will need to prune it occasionally; failure to do so can lead to it withering away. Pruning is the key to survival.
The Christmas moss does not like high lighting. It prefers to be in
On the other hand, the java moss requires only trimming once in a while, which is not even a necessity for its survival. You can let it grow wild, and it will still live in the house and provide food for the fish in the tank.
If you want to add java moss to your aquarium, you can simply attach it where you want it to grow. But avoid moving it as that will interfere with the process. It is invasive and will likely cover anything that it fancies, so you might want to look out if it goes out of the area you only want it to grow on. To avoid its invasion over surfaces where you do not want it, you can use scissors to trim it before it completely attaches to the surfaces.
Their Benefits and Downsides
Lastly, let us see how Christmas moss vs. java moss compete in benefits and downsides.
If you’re looking for ways to mitigate the nitrogen level in your tank, Christmas moss is the way to go. And if your fish needs a nest to lay its eggs, the Christmas moss is one of the perfect spots. Additionally, it provides shelter to smaller fish and crustaceans for community tanks.
The only downside that should really concern you is the algae build-up that can happen on the top of it. Algae is never good in an aquarium tank, but this can be avoided if it grows in the ideal water condition.
The java moss is well known to be able to soften harsh conditions in your tank. Breeders also prefer putting java moss in their breeder tanks as it proves to be a great nesting place to attach eggs. Its low maintenance status also allows the breeders to focus on their fish and the coming fries.
Once again, the possible problem you may encounter with the java moss in your tank is algae buildup. Aside from good water conditions, adding algae-eating fish can also prevent the build-up.
Last Words
Venturing this small part of the world of mosses underwater, we are provided with essential information that can help you reach a decision. After comparing Christmas moss vs. java moss, you are now equipped with the knowledge of their subtle contrasts that can make a stark difference to your tank.
The post Christmas Moss vs. Java Moss: The Subtle Contrasts appeared first on Aquatic Eden.
]]>